Any Office ribbon tab can be more useful for you. By trimming some of the buttons you don’t need, making room for the buttons you want. We’ll show you how to remove some of the less needed ribbon sections (likely from the Developer tab) to make more room for your own buttons.
Previously we’ve explained how to get the Developer tab in the Office apps.
Some of the ‘Developer’ options are useful for regular Office users. Managing macros, restricting editing and handling templates.
But there are others you might not need or even understand! Hide them away to make room for buttons you’ll really use.
Here’s an example of a Developer tab with some of the preset buttons removed and some of our preferred ones added on the right.
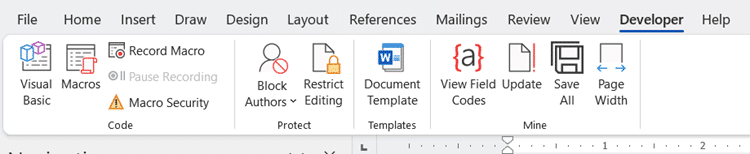
Peter has the View and Update Field Codes buttons instead of remembering the Function key shortcuts. Save All because he doesn’t trust Word’s AutoSave 😊. Page Width for easy access (there’s no in-built shortcut).
Yes, you can make your own tab but for many people that’s too much. If you only need a few extra buttons, then a shortened tab is all you need.
Any Office for Windows from Office 2007 onwards can do this. Also modern Office for Mac, though the ribbon customization is done via the top-left app menu | Preferences | Ribbon and Toolbar.
Note: you can do this to ANY Office tab but Developer tab is the usual choice because it often has buttons that aren’t regularly needed.
Make your own Developer tab
Click on the Developer tab, then right click on the ribbon | Customize the Ribbon…

This will open the Word Options box, simply click on one of the Groups from the list, then select the Remove button located in the middle, once you press OK it will be removed from the list.
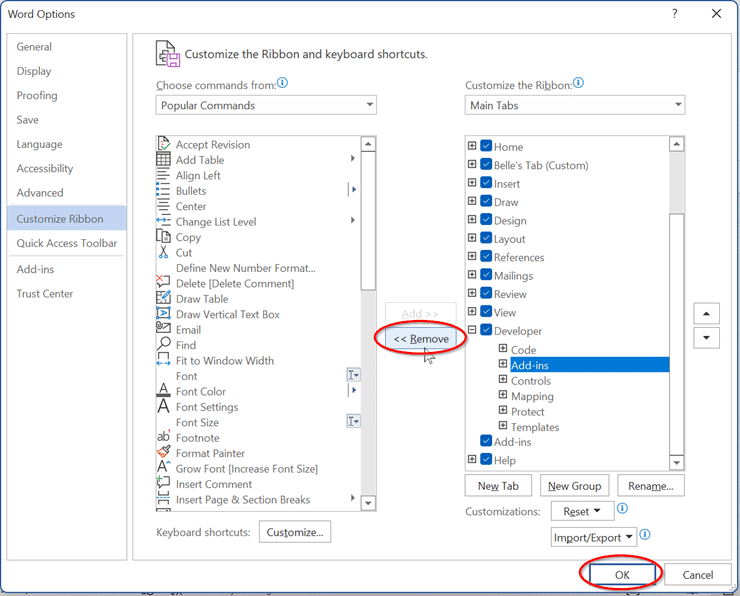
Remove Add-ins or Controls which you may not use as often or at all!
Add a Custom ribbon group
You can also add your own custom group for your choice of buttons.
Press New Group | Rename… and choose a new for your group.

From there you can search for your favorite buttons from the list on the left and click on the Add button to move them to your custom group on the right.
Move to the left
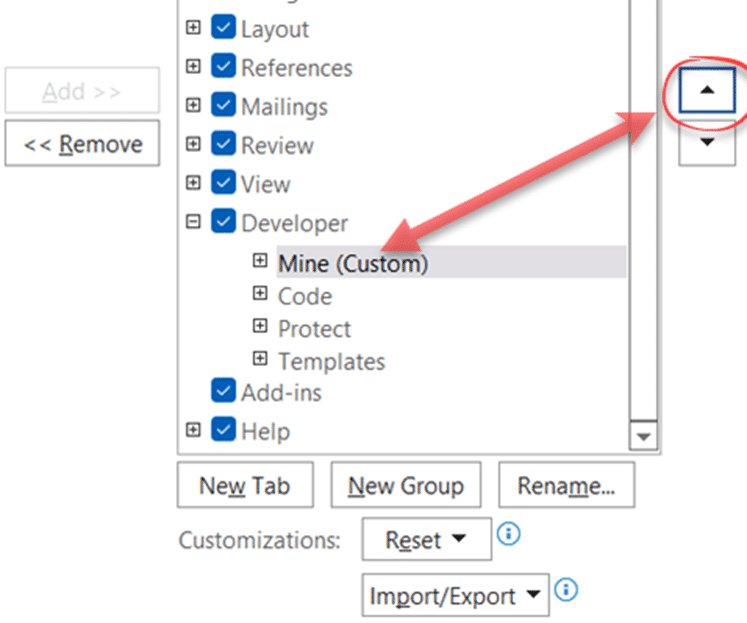
There’s no rule to say the Microsoft supplied buttons have to come first. A few mouse clicks will move your group of buttons to the prime, left-hand position like this …

Use the Up arrow to put your button group on the left.
Once you’ve pressed OK to save your changes, you’ll be able to preview it in the Developer tab.
How to get the Developer Tab in Office apps
How to use Excel’s Accessibility Ribbon
Easily create and customize your own tab on Office Ribbon