Here’s how to make the latest web ‘parallax’ effect in PowerPoint.
Parallax effect is where a photo appears to move ‘out of the way’ as a new slide appears. You see it in modern web sites like this:
See how the photo moves up, as the new slide also moves up? That’s the parallax effect.
It’s a nifty trick that makes use of the relatively new Animation and Motion Path features in PowerPoint for Windows/Office 365.
The current Office for Mac and earlier PowerPoint have animations but not the motion paths option. An alternative is the ‘Rise Up’ preset animation which gives a similar result.
Even if you’re not interested in the parallax effect, this article will show you some useful PowerPoint features:
- Selection Pane
- Renaming objects, so they are easier to identify
- Grouping objects, so they all ‘work together’ and are easier to select / modify
- Show/hide objects, makes it easier to work on an object without clutter.
In Parallax Effect in PowerPoint Part 2 you’ll see:
- Animation Pane
- Motion effects
- Animation trigger, on click
- Manually adjusting the motion path
- Animation timing, making the action go faster or slower.
First slide
Make your first slide as usual. Your image as the full slide background plus some text in a text box.

The parallax effect works best if there’s a consistent color across the bottom of the photo. That color is used in the second ‘slide’.
The text box has a transparent background.
The second ‘slide’
The trick to this effect is that the second ‘slide’ isn’t a slide at all. It’s a hidden text box extension of the original slide.
PowerPoint can ‘save’ objects outside the viewable slide, which is very handy for animations because it gives you somewhere to keep additional objects until they are needed.
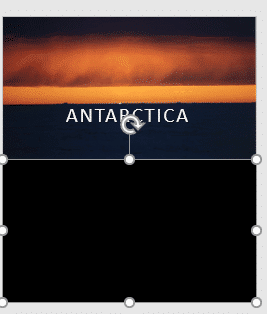
Insert | Text Box the same size as the original slide, by drawing the box over the slide area. Then drag the text box down until it’s below the slide with the top edge of the text box on the bottom edge of the slide.

Then change the text box background to match the bottom color of the image.

One slide, two ‘slides’
Here’s what we have so far, with a single slide having a visible part at the top with the hidden text box at the bottom.

Add some text to the second ‘slide’. Maintain the same formatting as the text in the main slide by copying the text box and pasting a copy into the second ‘slide’.

Selection Pane
The selection pane is a really useful Office feature to help you see all the objects or parts of a slide in a simple list.
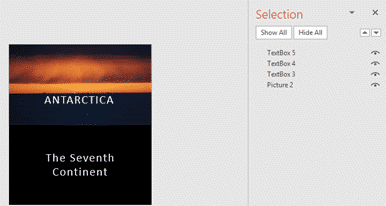
Picture Tools | Format | Selection Pane to see what makes up the current slide.

As you can see, there are three Text Boxes plus the Picture.
The default labels aren’t a lot of help in a crowded slide so we like to rename the objects. That makes them easier to identify and select, especially if you’re returning to the presentation after some time.
To rename, double-click on the label and type in what you like.

Another way to find an object is to hide the ones you don’t immediately want. The little ‘eye’ icon at right indicates that the object is visible. Click on the icon to temporarily hide that object.
Group objects
Often, objects appear or work together. Just like advanced graphics editors, Office lets you group objects together.
Select multiple objects by holding down the Ctrl key and selecting the objects (in the pane or directly on the slide). They’ll be selected in the slide and pane views.

Then group the objects from Drawing Tools | Format | Drawing | Arrange | Group.

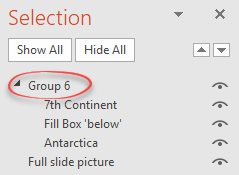
The Selection Pane shows the group as ‘nested’. The group can be renamed, if you wish.

Now we have all the objects in place, labelled and grouped, we’re ready for some PowerPoint animation trickery in part two.