Word has many ways to view a document. Some are obvious, others aren’t so obvious. Let’s look at both types.
We’ll first look at the shortcuts and quick ways to change view, then go into more detail on some more interesting part of modern Word for Windows – the windows options and Read Mode.
Status Bar
The quick viewing options are on the right of the status bar:
Read Mode
Let’s you view the document without editing. Handy on modern tablets or touchscreens. See below for more detail.
Print Layout Mode
This is the usual mode for editing a document.
Web Layout
See the document as it might look as a web page.
Zoom slider
In Print Layout mode, the center of the slider is 100% view. The nice touch by the Microsoft developers is that the center point is a little ‘sticky’ – as you drag the slider along it will stop at the center/100% point for a moment.
Slide to the left and you’ll start to see more than one page. Slide to the right to zoom into the current page in greater detail.
In Read or Web Layout mode, the slider changes the size of the visible text and wraps the text to fit the Word window.
Shortcut keys
Ctrl + F6 will cycle through the open Word windows
Ctrl + W or Ctrl + F4 to close the current document windows, with a save prompt if necessary.
Ctrl + F10 Maximises the current window or restores it to the per-maximized position.
Switching Views
There are three shortcuts for switching between edit views:
Ctrl + Alt + P – Print Layout view
Ctrl + Alt + O – Outline View
Ctrl + Alt + N – Draft View
Windows
First, let’s look at the View Window section which is quite powerful but less appreciated than other parts of the View tab.
Here you can:
- view the same document in different ways at the same time
- Split a document view so you can see two different parts of the document at the same time.
- put two similar documents ‘side-by-side’ and scroll both at once.
- switch between open Word documents
- quickly arrange all open documents so you can see them all on the screen.
New Window
Opens a second window for the same document.
You can view different parts of a document or the same part of a document in different ways (eg Draft View and Print Layout).
Arrange all
Arranges all the open Word windows so that each take an equal amount space on the current screen.
There’s no Undo for this action. Rearranging the windows after an accidental ‘Arrange All’ is a pain.
Split
Spilts the current document into two viewing panes within the one window (unlike New Window which makes another window).
You can scroll each of the split windows separately, even ‘drag and drop’ content between the two. Use it to edit or compare two parts of the same document. For example, comparing the wording of two document sections to make sure they are consistent.
The split line is quite discreet and defaults to the middle of the editing window. You can drag it up/down to change the viewing size on each side of the split.
To remove the split either click on ‘Remove Split’ on the toolbar or simply drag the split bar to the top or bottom
View Side by Side
Arranges for two documents to take up the entire screen side-by-side vertically. As opposed to Arrange All which is for all Word windows and horizontally.
If you have two document windows open, it will re-position those two. If there’s three or more open documents, you’ll be asked to choose which other window to re-position.
Using two windows open to the same document you can think of it as an alternative to Split except with entirely separate windows for each one.
Synchronous Scrolling
With documents side-by-side an interesting option becomes available – Synchronous Scrolling.
If you have two similar documents (eg versions of a contract), open both with View Side-by-Side, move both documents to the top (or the same position) then click Synchronous Scrolling.
Now, as you move one document, the other one will move in unison.
Reset Window Position
If you move one of the two windows, pressing ‘Reset Window Position’ will return it to the ‘side-by-side’ location.
Switch Windows
A pull-down list of the open Word windows. Choose one to switch to that document.
Read Mode
If you want to read a document and not do any edits, this is the choice for you.
View the document and move between pages with the left/right arrows or swipes on a touchscreen. Use the Zoom slider to change the amount of text that appears in a window.
The File menu is the same.
Tools gives you Find and Smart Lookup. The usual Find shortcut – Ctrl + F – works here.
View tab is the most interesting.
Edit Document – returns you to Print Layout mode,
Navigation Pane – turns on/off the left side view of the document headings.
Show Comments
Column Width – for multi-column documents this lets you change the spacing between the columns.
Page Color – changes the background for Read mode only, not the actual page background. Sepia makes reading a little easier on the eyes. Inverse is good for people who have trouble reading the screen.
Layout – Column Layout reflows the document to show a part of the document in the available windows – scrolling is left/right. Paper Layout retains the look of Print Layout view – scrolling is up/down.
Word’s View Tab
The main viewing options are on the View tab (surprise!). We’ve already looked at some of the more interesting options, here’s a quick look at the rest.
Print Layout
This is the default and most commonly used mode for editing a document.
It should look the same, or nearly the same, as a printed page.
In Print Layout, the gap between pages is usually shown but you can close that gap (save some screen space) by double-clicking between the pages.
Our favorite choice in Print Layout mode is Page Width.
Web Layout
A single, continuous page view of the document as it might appear on a web site.
Outline
This shows the structure of the document in ‘point form’ using the Headings (strictly speaking the Outline levels linked to the Heading styles).
Outline mode is also the gateway into Master Documents.
Draft
Draft mode is a very simple view of the document. It was commonly used many years ago, when computer graphics were slower and it was difficult to edit a document with a fully rendered print layout.
These days, computers can cope better and Office makes better use of modern graphics cards so most people use Print Layout mode.
If you have a large or complex document that’s slow to scroll or update when typing, try Draft mode.
Show
A few choices of the amount that appears on the screen.
Ruler
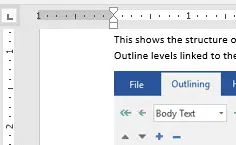
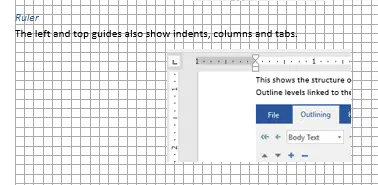
The left and top guides also show indents, columns and tabs.
Alas, you can’t choose just one. It’s both or none.
Gridline
Useful for positioning shapes, images or objects.
Navigation Pane
The incredibly useful ‘tree’ view of headings (outline levels) in a document.
Zoom
Opens up a dialog box of zoom options, many of which are available on the ribbon.
One that isn’t on the ribbon is ‘Text Width’ which displays the entire ‘core’ of the document without space for side margins.
100%
Same as putting the Zoom slider to the center position.
One Page
Display the entire page in one window. Great for seeing the overall layout of a page and positioning objects.
Multiple Pages
Displays more than one page at a time. Somewhat pointless on smaller screens but handy to see the layout on larger screens.
Office 2016 for Windows as part of Office 365 is getting an expanded multiple page view to work with larger screens.
Page Width
Our preferred view in either Print Layout or Web Layout. Zooms the page so you can see as much of the page width-wise as possible.


