If you’ve ever tried to enter a number starting with zero into an Excel spreadsheet, you will have had the frustrating experience of finding that as soon as you exit the cell, the zero disappears from the front of the number. Here’s how to stop Excel from ‘helping’ you when it’s not wanted.

Because zero at the beginning of a number does not change the value of the number, so Excel assumes it’s not needed. If the number is a membership number or product code that needs the zero to stay there.
Never fear, there are a couple of things you can do to tell Excel to leave the number the way you have typed it.
Use an Apostrophe
If you just have an occasional cell where you need to keep the leading zero, all you need to do is type an apostrophe (‘) before the number.

Note, however that when we exit the cell, even though the number has kept its zeroes, Excel is showing the little green triangle in the corner that flags a problem or something you need to be aware of. Click on the exclamation point next to the cell for more information.

The message tells us that the cell contains a number stored as text, which is what we want, so we can click Ignore Error.
The apostrophe trick is useful in other situations where Excel gets in the way. If you want an equals sign = at the start of a text cell, Excel will think it’s a formula. Type an apostrophe before the = and Excel knows it’s text.
Change the Cell Format to Text
As the note above tells us, what we are doing by putting the apostrophe in front of the number is telling Excel to store it as text, not as a number. If we have a lot of numbers that need to be stored this way, it makes sense to set the format of the cells to text to begin with, so we don’t have to enter an apostrophe every time.
Note that if you want to use this method, you must set the cell format before you enter the numbers. Once the leading zeroes have been removed, changing the cell format won’t put them back.
Let’s say we have a column in our worksheet that will hold membership numbers, and we want to make sure leading zeros don’t get stripped from those numbers. So we want to change the cell format for the whole column to Text before we enter the numbers.
Right-click at the top of the column and select Format Cells.

Alternatively, you can select the column and click the dropdown under Home | Number and select More Number Formats.

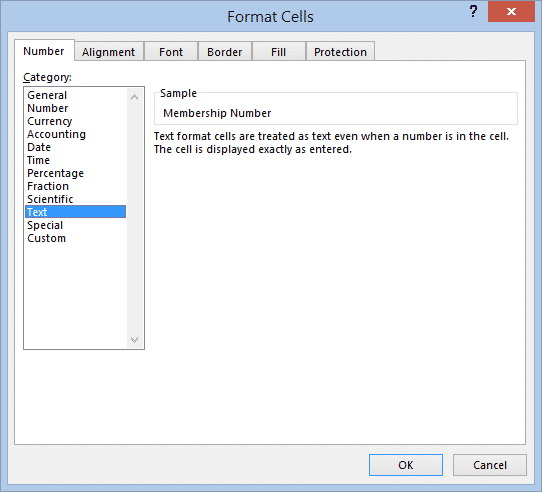
Then we just select Text on the Number tab and click OK, and we’re done.
Now any numbers with leading zeros entered in that column will automatically keep their zeroes.

Use Custom Format to Set the Length of the Number
There’s one more way to make Excel retain leading zeroes, and it’s the only way that can restore zeroes that have been removed. However, it only works if all numbers in the column need to be the same length.
Continuing with our membership number example, let’s say that all our membership numbers are six digits long, and some start with zeroes that Excel keeps removing. In this case, we want to tell Excel that every number in that column should always have six digits. This time in the Format Cells dialog we choose Custom format, then type six zeroes in the Type box.

This will cause any numbers with less than six digits to have zeroes added to the beginning.

Excel merge arrays into a single array with VBA
Text formatting in Excel with wrapping, line breaks and merging
Date Formatting considerations in Excel & Office
Justify, Fill, Orientation, Shrink to Fit and other Excel formatting tricks.