Tired of Microsoft Word flagging your writing with grammar suggestions that don’t make sense? The blue underlines can be more distracting than helpful—especially when Word disagrees with your style choices. Fortunately, you don’t have to put up with them. We’ll show you how to customize, disable, or completely turn off Word’s grammar checks in Windows and Mac, so you stay in control of your writing.
Social media often has complaints about Microsoft Word’s grammar suggestions, here’s just one recent example.
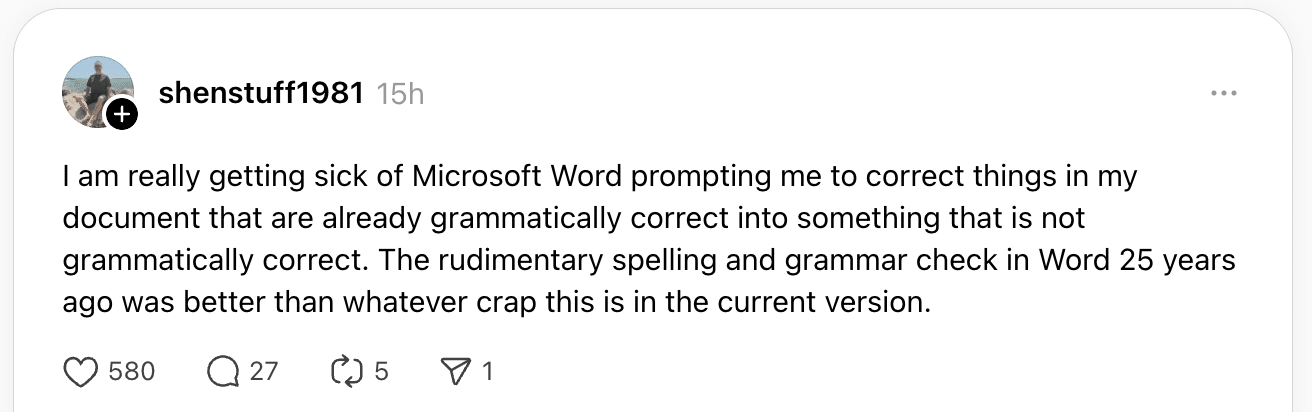
These posts might be attention seeking or trolling but let’s take one at face value as an example of what you can do in Word or Office generally.
Online grammar checkers aren’t perfect and especially not with English. To make matters worse, people can disagree about what is proper grammar, e,g Oxford Comma or Split Infinitives to name just two.
That’s why Microsoft offers many grammar choices so people can tweak the default settings to whatever suits them or turn the checks off completely.
Under the blue underline
The main controls for grammar checks are hiding in plain sight under the blue underline.
Left-click on an underlined word/phrase to see an explanation.
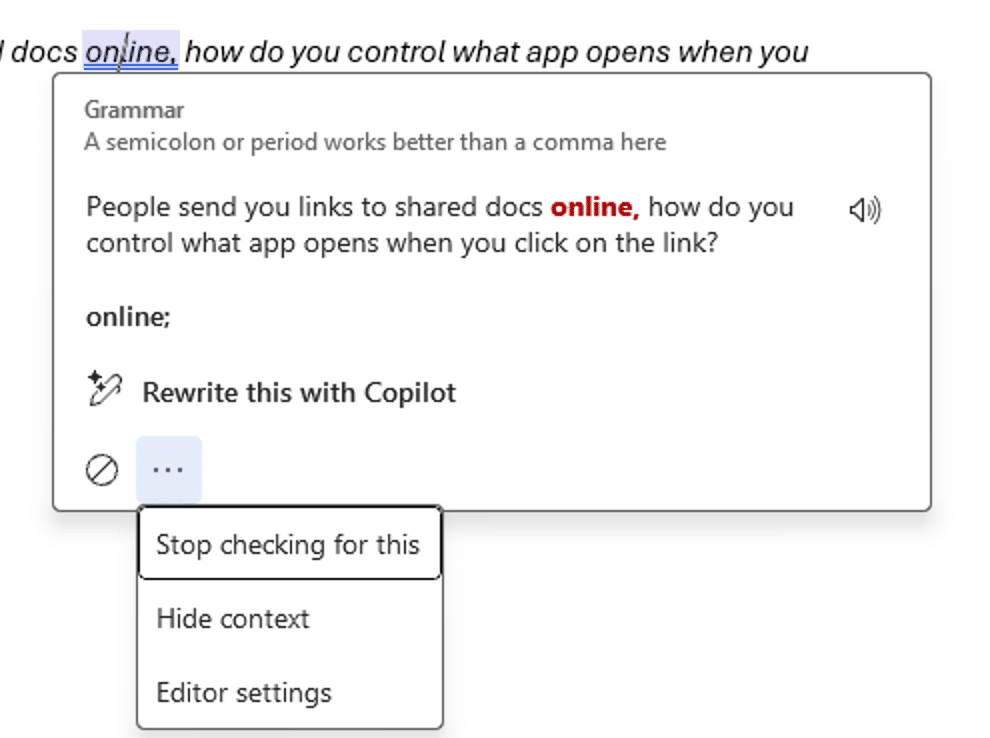
There’s a short explanation plus the larger sentence or phrase (“context”).
Your choices are:
Click on the suggestion (e.g. “online;”) to change the document.
⊘ (Stop icon) – Ignore once. Removes the blue underline for this occasion only.
Under the ‘three dots’ menu there’s more …
Stop checking for this – no more warning about that issue in this and any future document.
Hide context – removes the example line in that message box.
Editor settings – open up all the Grammar and Refinements choices.
Right-clicking shows a smaller version of the same thing but with more obvious options.
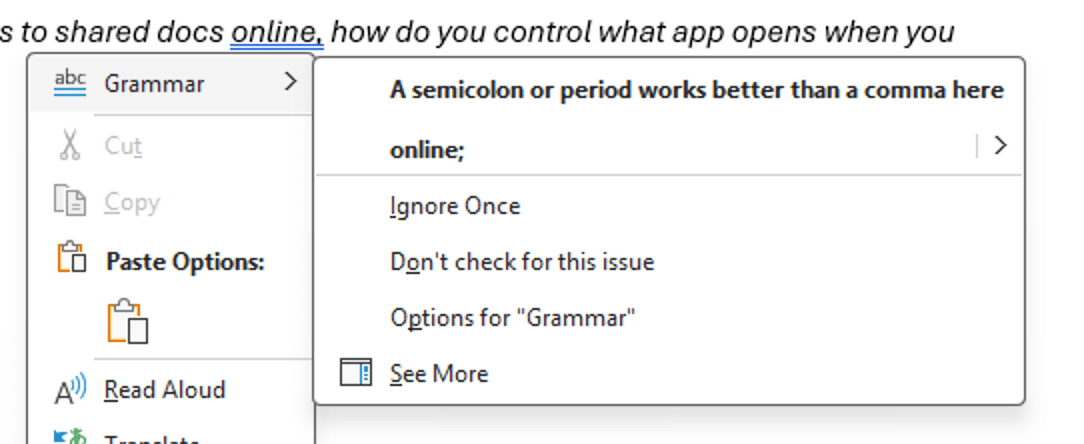
Click on the suggested fix to apply in the document.
Ignore once – removes the blue underline for that text only.
Don’t check for this issue – no more warning about that issue in this and any future document. The same as “Stop checking for this” in the other message box (see above).
Options for “Grammar” – open up all the Grammar and Refinements choices. The same as “Editor settings” in the other message box (see above).
See More – opens the Editor side-pane
What you can’t do with Grammar settings
The missing choice in Word’s Grammar messages is “Ignore for this document only”.
You can “Ignore once” for a specific word or phrase or “Stop checking for this” which applies to all documents, but nothing in between those two extremes.
That’s because, unlike some other Word settings, Grammar is setup in one place for all of Word (the “application level”). There’s no way to change the Grammar configuration for each document. That’s a “by design” bug in Word which Microsoft shows no interest in fixing.
Grammar and Refinements settings
Don’t get us started on this long and complicated dialog box. It’s just one of the Office dialogs that badly needs an upgrade so customers can find what they are after.
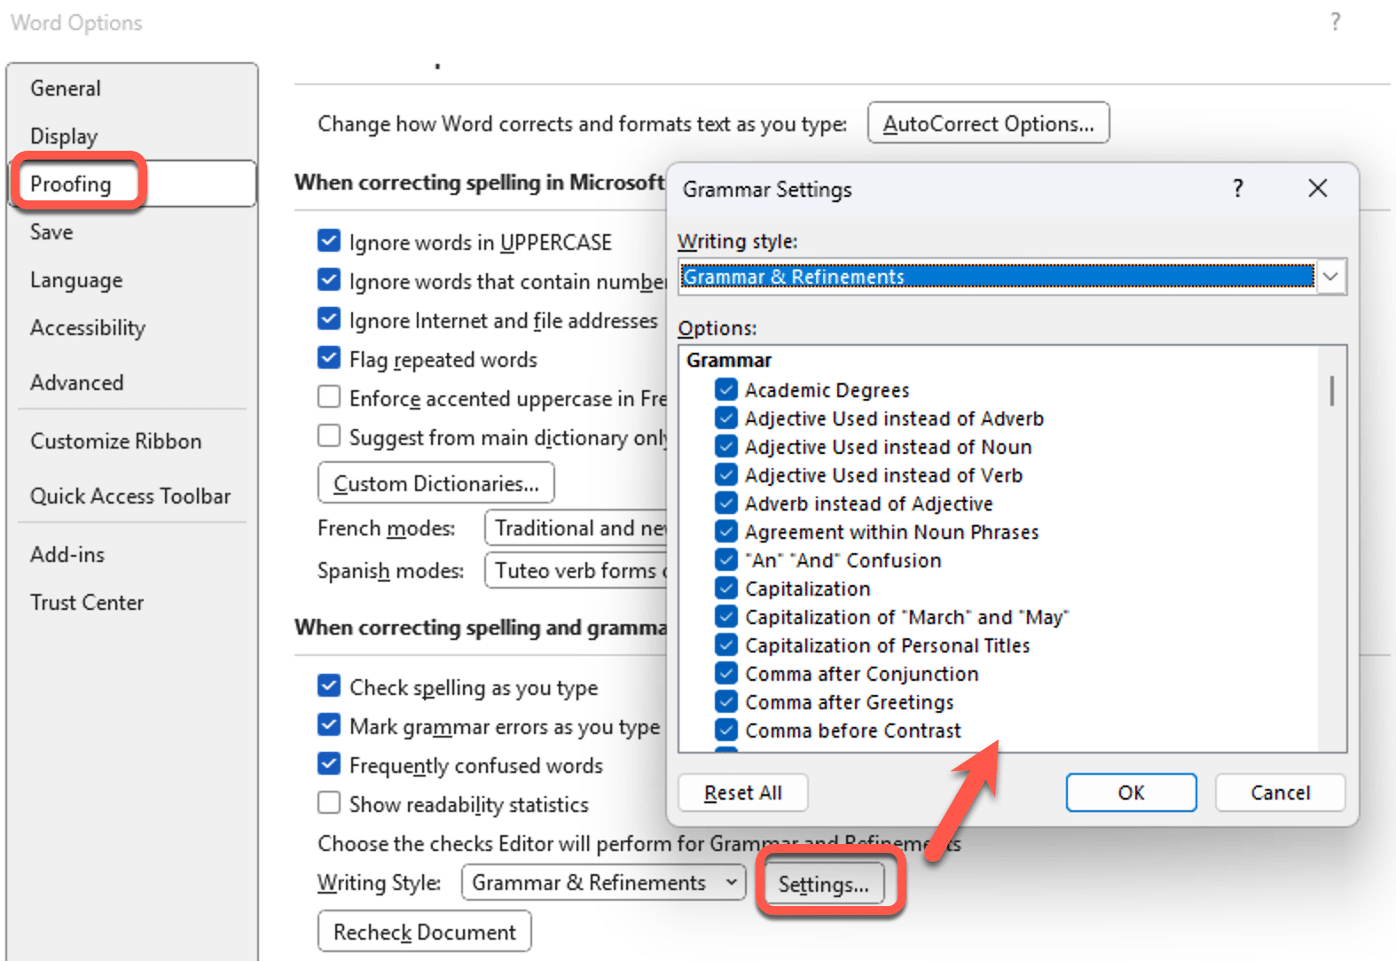
The best way to ‘fix’ Word’s Grammar settings is to turn off unwanted suggestions as they appear in your documents.
Turn Word’s Grammar checks OFF
Word users also have the option to turn off the blue underline grammar suggestions completely.
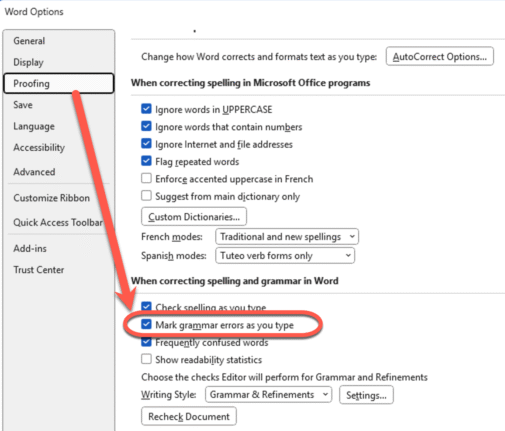
Word for Windows
Go to File | Options | Proofing | When correcting spelling and grammar in Word | Mark grammar errors as you type.
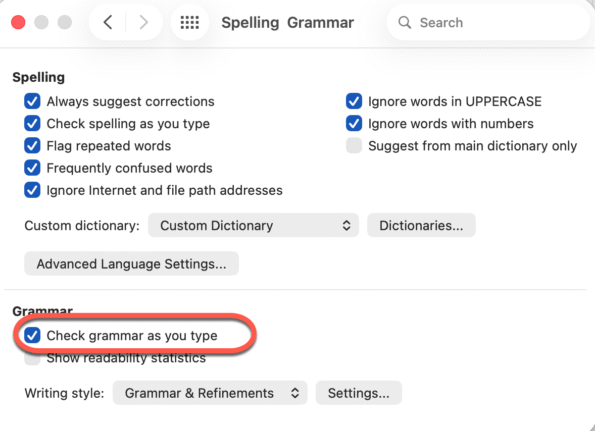
Word for Mac
Word for Mac, the same setting is at Word | Preferences | Spelling and Grammar | Check grammar as you type.
Stop Microsoft Word’s Automatic Formatting Tricks
Largest to smallest, Word’s missing grammar check
Inside Microsoft’s “Top Grammar Mistakes” in Word
The Grammar Mistake Microsoft Word Still Doesn’t Catch — And Why It Matters