Drop Caps are very old fashioned, there’s space left for them in the oldest printed books in the world, the Gutenberg Bibles. You can do the same thing, a lot more easily, in Microsoft Word.
In this Office-Watch.com article we’ll go beyond the simple ‘how to’ for Drop Cap. There’s the basic settings supplied by Microsoft plus the extras available. Also many options not usually mentioned for Drop Caps including a third type of Drop Cap that’s not in the Microsoft list but easy to do. Finally we’ll look at why and when to use Drop Caps.
Gutenburg mostly printed black ink only and left spaces for drop caps and other ornamentation to be added by hand.
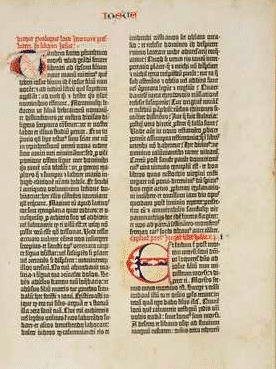
Each Gutenburg Bible is unique with its own drop caps. At the fascinating Gutenburg Museum in Mainz, Germany you can see two of his original Bibles open at the same page, side-by-side to see the very different look.
But I digress, these days we don’t need the skills of an artist to embellish a page and we can be consistent with each copy.
Word has a Drop Cap feature of long-standing. It’s become easier to use over the years with the arrival of Live Preview.
Start in any Word document, from the Insert tab choose the small Drop Caps drop-down in the Text block.

The basic choices are:
Dropped – within the current margins of the document and wraps around the text. The kind of drop cap that Gutenburg himself would recognize.

In margin – as it says on the tin, the enlarged cap in placed in the margin at the edge of the text.

Modern versions of Word include Live Preview, so you can see the effect of the drop cap setting immediately in your document.
The ‘missing’ Drop Cap option
Strictly speaking there’s a third drop cap option not included in Word.
The first letter or, more usually, word has a slightly larger font than the rest of the text. It has the same margin and baseline as the rest of the paragraph.

This version is simple to apply. For consistency, make it a character style so you can change the look across the document in a few moments.
Word or Letter
Word will automatically select the first letter of the current paragraph to apply the Drop Cap. However, you can change that by selecting multiple letters or a word at the start of the paragraph before applying the Drop Cap.

As we’ll see later, you can also change the text inside the Drop Cap box.
Remove a Drop Cap
To remove a Drop Cap, just choose ‘None’ from the Drop Cap drop-down list.
Settings
There are a few Drop Cap settings at Drop Cap Options. These options haven’t changed for over a decade.

Font – switch to another font for the drop cap.
Lines to drop – the height of the Drop Cap, measured in lines of standard text. Must be an integer, no decimals allowed.
Distance from text – the spacing around the Drop Cap. Can use decimals here.
More choices
But that’s not the end of your choices, not by a long shot.

To make a drop cap, Word creates a ‘text box’ like object (technically it seems like a Frame – an otherwise obsolete Word feature). You can resize and reposition it as you like using the handles on the edges and corners of the box.
It’s too easy to accidently drag and drop a Drop Cap away from its original location. Don’t panic. Undo Ctrl + Z will return it.
The fact that it’s ‘text box’ means you can change the contents. Just click in the box and it becomes editable. You can select the contents:

Then change the formatting, just like any other text. Color, bold, italic, underline etc. are all available.

You can change the font, also the shadow, reflection and other options at Font formatting | Text Effects or the text effects button on the Home tab.


Text Effects | Text Fill has Gradient options for a ‘fade’ effect in the letter:

Using settings like this:

Ligatures can also be used in Drop Caps.
Styles and Consistency
The letter or text inside the drop cap box can have a character style applied to it.
Just select the characters inside the box and apply a character style in the usual way. Or make new character style to suit. This example applies Purple, italics.

Note: this applies to the text inside the Drop Cap box. There’s no direct way to change the settings for multiple Drop Cap boxes at once.
Images
For a truly ornate look, a la ‘Gutenburg Bible’ replace the text inside the Drop Cap box with an image.

Select the text inside the Drop Cap box and paste in the image you want. You’ll probably have to resize and reposition the image a bit so it looks right with the text beside it.
The image doesn’t have to be a letter, use an appropriate image instead.

When to use a Drop Cap
Like many document embellishments, Drop Caps are best used sparingly.
For many centuries (pre-and-post Gutenburg), Drop Caps were used to identify the start of a new chapter or section of text. Paper (parchment) was expensive so space wasn’t wasted by having chapters start on a new page. These days we can afford to leave space to separate parts of a document.
Starting a chapter with a Drop Cap isn’t necessary but can add a little style to the page.
Drop Caps can be used to add a sense of style, elegance, tradition or history. Perhaps in wedding stationery or funeral service booklets?
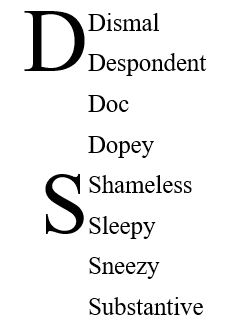
Drop Caps could be used to highlight the letters in an alphabetical list.