How to lock your Excel worksheet from editing – the whole thing or some cells. Allow some people to edit a few cells, leaving the rest of the cells and formulas untouchable by others using the worksheet.
Here’s a very simple example:

Anyone opening the worksheet can enter a US dollar amount to see the latest equivalents in various currencies. But they can only enter an amount and see the results, they can’t change the formulas and code behind the visible cells.
Read only x 2
There’s two ways to make a Word document ‘Read only’ – meaning that it can’t be edited, only viewed.
Windows
Any file can be marked as ‘Read only’ at the system level. This means the file can be opened and viewed but no changes can be made to the file.
To do that, close the document in Office. In Windows Explorer, right-click on the file, choose Properties | General and check the ‘Read-only’ box.

If you open a ‘Read only’ document in Office, you can make changes but if you try to save you’ll be presented with a Save As dialog to save under a different name. In the title bar you’ll see “(Read-Only)” after the document name.
This applies to any file and any program in Windows.
Save As options
If you want people to view the worksheet but not edit it, consider ‘Save As’ to another format, most likely PDF.
This doesn’t work well for large worksheets because the PDF version of a worksheet is harder to navigate.
Inside Excel
The Protection options in Excel are on the right side of the Review tab

You can protect any part of a workbook:
- Whole Workbook
- Individual Sheets
You can unlock selected parts of a worksheet to allow them to be edited but it’s done differently in Excel than in Word.
It’s quite possible to lock an entire workbook then unlock a single cell for editing. For example, a complex loan calculation where the end-user can enter the loan amount only. We’ll show how to do that later in this article.
Before you start
Before you lock up a workbook or sheet, make sure the viewing settings are suitable. In particular, Freeze Panes.
Whole Workbook
Go to Review | Protect Workbook

The password is optional. With no password the protected workbook can be unlocked and edited with a click of the mouse.
Sheet
Protecting at the sheet level gives you a lot more options than locking the entire worksheet.
Choose Review | Protect Sheet or right-click on the sheet tab and choose Protect Sheet.

As you can see, there are options to permit various types of editing on a sheet-wide basis.

- Select locked cells
- Select unlocked cells
- Format cells
- Format columns
- Format rows
- Insert columns
- Insert rows
- Insert hyperlinks
- Delete columns
- Delete Rows
- Sort
- Use AutoFilter
- Use PivotTable and PivotChart
- Edit objects
- Edit scenarios
Locked and Unlocked cells
Before we continue, we need to talk about cells – locked and unlocked. This has been in Excel for a long time and the source of much confusion.
It might seem that you can only Protect entire sheets because when you choose Protect for a worksheet, the entire sheet becomes Read-only. In fact, you can make individual cells editable using the Lock status of each cell.
Every Excel cell has a ‘lock’ status – locked or unlocked. But the lock status has no effect until you Protect the sheet or workbook.
Only when Protected does the locked/unlocked state make any difference.
All Excel cells start in a ‘locked’ state (which is what confuses people). With all cells set to ‘locked’ the entire sheet will be read-only if you choose to Protect that sheet.
Change specific cells to ‘Unlocked’ so they are still editable when the sheet is Protected.
Here’s a simple example. The white cells have been unlocked and so they are editable when the sheet is locked. All the other cells are locked (the default) and can’t be changed.
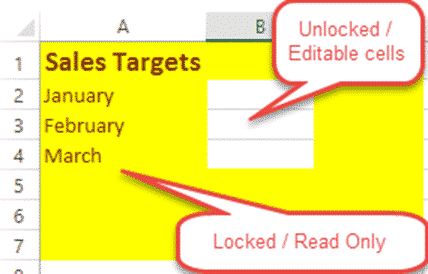
The cell colors don’t effect the locked/unlocked state, that’s just to make it clear to users where they can edit and where they can’t.
There are various places to set or check the lock status of cells. Right-click on a cell and choose Properties | Protection

Or go to Home | Cells | Format and check the pull-down list.

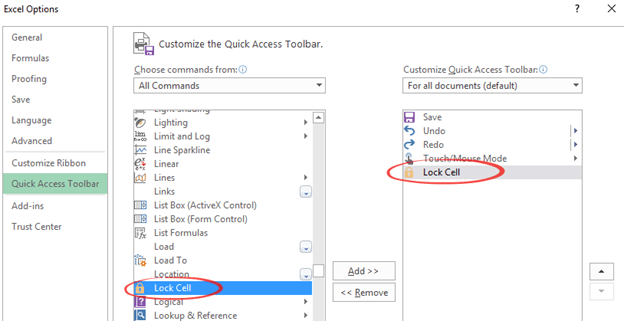
If you’re checking Locked/Unlocked cells a lot, add the Lock Cell button to the Quick Access toolbar.
Styles – the locked/unlocked property can be set in a Cell Style, along with all the visible cell attributes like color etc.
Putting it all together
To make a worksheet fully ‘read-only’ is simple –
- Right-click on the sheet tab and choose Protect Sheet.
- Add an optional password and it’s done.
Because all cells are ‘locked’ by default, the entire sheet will be protected from editing.
To allow some cells to be editable with others ‘read only’ –
- choose the cells that you want editable and change the cell to ‘Unlocked’
- Once you have the right mix of locked and unlocked cells then Protect the sheet.
Tip: put some help text and change the background color of editable/unlocked cells so the cells to change are obvious to people using the worksheet.