Adding your signature or signing a document digitally is possible in different ways using Microsoft Word or other Office programs.
Before we start, let’s clarify some terminology because ‘signing a document’ can mean several things in the computer world:
- Adding a signature to a document. Inserting a copy of a human written signature into an electronic document. That’s what we’re covering in this article.
- Digitally signing or locking a document. A way of verifying that a document came from a specific source or author and has not been tampered with after sending. It’s possible to do that in Microsoft Word but most people don’t bother. And most people receiving a locked document would not understand either! It’s commonly used to verify VBA code and other digital media but not whole Office documents.
- Digital signing systems. There are various proprietary systems for ‘signing’ a document, the most common is Docusign. If a company wants you to ‘sign’ a document this way, they’ll send you a link and instructions.
- Email signature — the footer at the end of emails. That could include a picture of your ink signature.
In this article we’ll explain your options for adding your human ‘ink’ signature to a letter like this:

- Word, Excel, PowerPoint and Outlook
- Add your signature directly
- Make a picture of your signature
- Take a photo
- More than one signature
- Cropping your signature image
Word, Excel, PowerPoint and Outlook
We’re going to focus on Microsoft Word since that’s where most signing happens. The same tools apply to Excel worksheets, Outlook emails and PowerPoint slides.
Add your signature directly
Let’s start with ways to write your signature directly into a Word document. This is possible in modern Word and Office with ‘digital ink’ features.
Digital Ink
If you have an iPad, tablet or smartphone with a ‘pen’ then it’s possible to write your signature onto a Word document.
Open the document in the Word app, go to the Draw tab and choose a pen thickness and color. Then write your usual signature into the document.
If you have a touch screen, you can try ‘writing’ on the screen with your fingertip. It’s a little clumsy but might be enough.
Make a picture of your signature
You need a picture of your signature to paste into documents. There are a few ways to do that, depending on the devices and tools available.
Let’s look at the options in order of image clarity.
Write with a digital pen
Similar to writing into a document above. If you have a device with a digital pen (e.g. Apple Pencil or other drawing tool) write your signature, then take a picture of the screen.
Open the Word app or some other app which accepts drawing of some sort.
Write your signature on the screen, erase and try again until you’re happy with it. Remember this is a ‘keeper’ that you can use on any future documents.
Once you’re happy, take an image of the screen with your signature. See Taking screenshots – Windows, Mac and more which covers iPhone, iPad and Android screen image shortcuts too.
If necessary, transfer the screen image to another computer. Modern Camera Roll tools in OneDrive and Dropbox should do that for you automatically.
Or save the document or image from the app it was made in.
You’ll end up with an image showing the entire screen. It’ll need a little cropping, more on that below.
Take a photo
Write your signature on a piece of paper, preferably clean white paper for a good image. Then take a photo with your smartphone or camera.
Try to get a clean image on a plain white background with even lighting.
We suggest writing in blue ink, so your image is obvious and stands out a little from the black text in the letter or document. A digital signature in black doesn’t stand out as much as a real ink signature with a black pen.
Take the photo and transfer it to your computer for cropping.
More than one signature
While you’re preparing images of your signature, do you have multiple signatures to make images of?
Some people have a casual signature for informal occasions, personal letters, billet-doux etc. Another version for formal letters, contracts etc.
By all means, get signature images of both or all!
Cropping your signature image
However you made your signature image, it’ll need some cropping before it’s ready for use. This is a part of the process most ‘digital signing’ tips leave out.
Do it right and you’ll have a useable signature that’ll last you for years.
The main point here is to crop TIGHTLY. Leave very little white space around the sides of your signature. That will make it a lot easier to position later.
Insert the image into a Word document, other Office program or an image editor. Here’s our iPad screen shot from the Word app.

Use a cropping tool to trim all the excess around the signature. In Office, Picture Format | Crop.
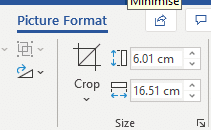
See how closely we’re cropping around the signature?
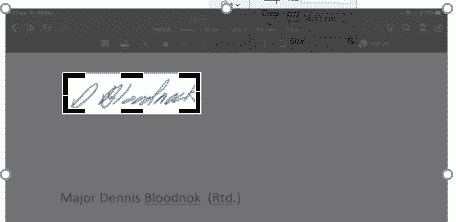
Here’s our final signature image, with a border so you can see how tight the cropping is. Your signature image should be clean with no border.

How to become a doctor with Microsoft Word
Signatures for all occasions in Outlook
Outlook Signatures to be synced – at last!