Use Microsoft Designer to make compelling but effortlessly professional titles for Word documents, sheets or slides. We’ll explain how to do it, not the simplistic way that Microsoft hypes, but how Designer works in the real world. Start a banner, tweak sizing, customize fonts and colors, then seamlessly insert your perfected headline.
According to Microsoft, making a design is simple. Just type in a request, Designer will make something that you can use right away. “As If”.
In the real world, Designer can make most of a good graphic but it takes the human touch to get it 100% right. That’s what we’ll show you in this article.
Creating an eye-catching title banner is the first step toward making your Word documents truly stand out. With Microsoft Designer, you have powerful and accessible tools at your fingertips to craft professional-quality banners, tailored for everything from posts to newsletters. Instead of just text, make a more interesting and decorative start to your document.
Use Designer’s intuitive interface to experiment with styles, customize fonts, and match colors precisely, ensuring your document makes a memorable first impression.

Start a Designer banner
Go to Microsoft Designer (free with a Microsoft account) or jump direct to the Banners option.
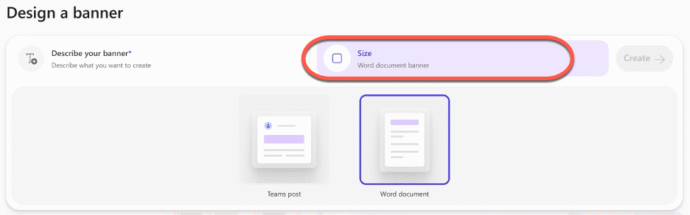
Size
First, click on the size button to choose between a banner for a Teams post (1318×367 px) or Word document (1350×270 px). Change to Word document.
Describe what you want
Type your idea – e.g. or “Modern abstract stripe banner with purple accents.” or something with text in double-quotes “1970’s hippy style banner with the words “Woodstock party”.”
We tried “A banner for a community newsletter called “Somerville Star” with a faint Art Deco design using a mid-blue colors.”. Designer added the words “Community Newsletter” into each banner .. Grrr
So we changed to “A banner for a newsletter with a faint Art Deco design using a mid-blue colors. Use only the words “Somerville Star”. “
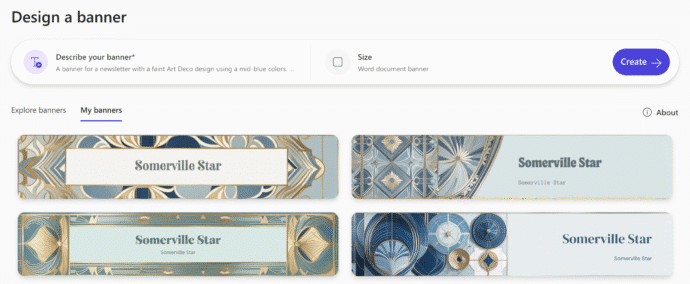
That gave us four designs to choose from. None of them are perfect because of the text which is too small and duplicated, but that can be fixed elsewhere.
One trick with Designer is not to seek a perfect banner, instead aim for a design that you can work with by adding some human editing.
Pick a design
Click on a selected design to either edit in Designer or download.

You could download then edit the image in Word or some other editor (like Paint) but we’ll edit in Designer.
Edit in Designer
We’d like to change the text to another font and much bigger. Do that from the Edit pane (left) then click on the text block.
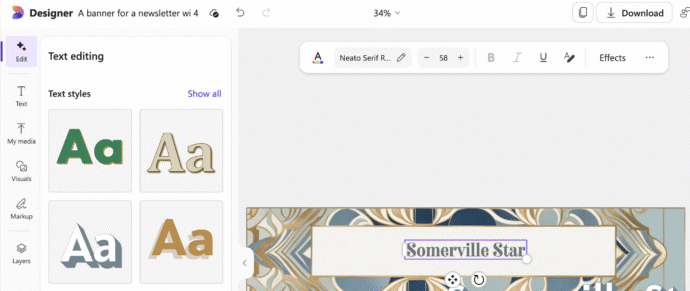
The text from the AI made image has come into the Designer Editor as a separate block, not as part of a single image.
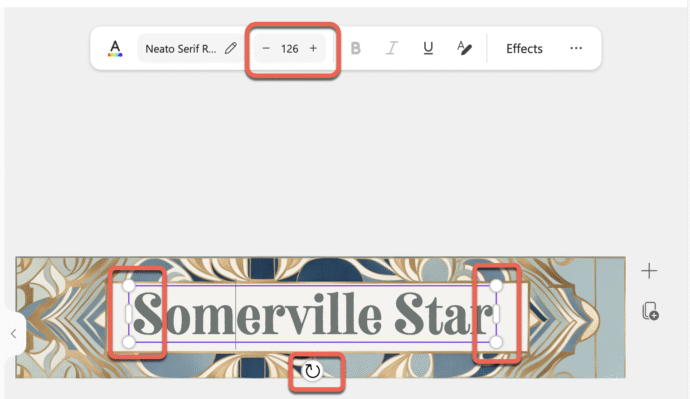
Resizing text in Designer can be done two ways:
Change the point size in the toolbar – obviously.
Drag the handles around the text box. This is less obvious – Designer text automatically resizes to fit the text box, unlike in Word or PowerPoint,
Change the font
Designer has a wide range of fonts available and will show the selected text in the example.

Search for a font by name or look through categories; Display, Friendly, Fun, Handwritten, Modern, Reliable, Retro, Sans (Serif), Script, Serif, Text or Versatile.
Change Color
Designer has a nice feature for any color choice, the eyedropper. This lets you exactly match a color already in the design or some other source on the screen.
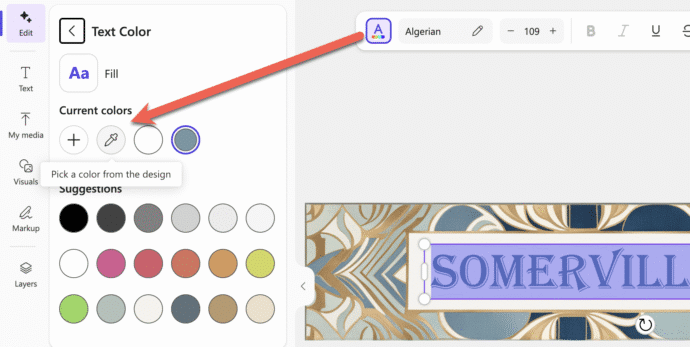
We changed the text color to match the gold parts of the border design. Matching colors is a simple and effective way to get a consistent look in a design.

Download or copy to clipboard
From the top-right Download menu there are options to download as an image (PNG or JPG) but we prefer the faster “Copy as image” option.
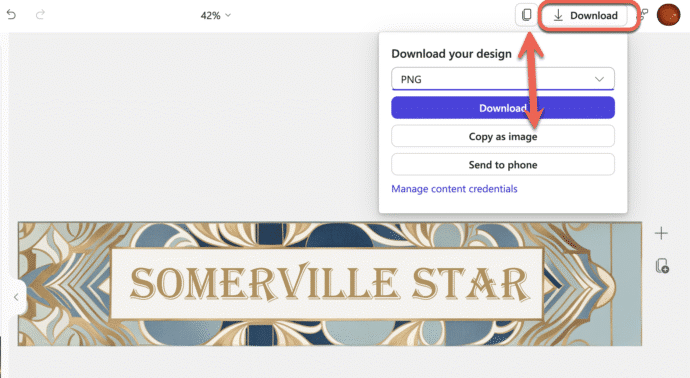
Copy as image means the finished banner is added to your clipboard, ready to be pasted into a document, sheet, slide or email.
Microsoft has realized this is a better option, so now there’s a ‘Copy as image’ button next to the Download menu.
Insert into Word
Paste into a Word document (or Insert | Pictures | From This Device if saved as an image) and position it at the top of your document.

Generative ‘Smart’ Erase returns to Designer