When including images or other objects in a Microsoft Word document, it can sometimes be a bit fiddly getting the text to flow around them in the way you want. The text wrapping break lets you specify the point where the text should drop down below the picture.
When you have text wrapping around a picture, you may be tempted to just put in extra line breaks or paragraph breaks when you want to shift text down below the picture, as below.
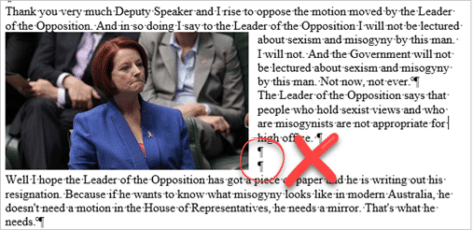
The problem with this method is that if you later make changes such as moving the picture or adding or removing text, the text wrap will no longer be in the place you wanted it. Below I have removed some of the text, and now the “Well I hope…” text is no longer below the image.

That’s why we have the text wrapping break – to ensure that when we put a break in text around an image, it stays where we want it.
To insert a text wrapping break, put your cursor where you want the text to break, and go to Layout | Page Setup | Breaks, and select Text Wrapping.

Now the text has dropped below the picture without using any superfluous paragraph breaks.
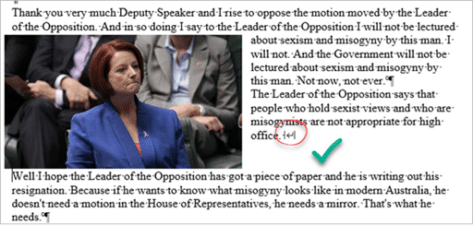
This time if we delete some of the text or make other changes, the paragraph will still drop below the picture at the same point as before.
Removing a Text Wrapping Break
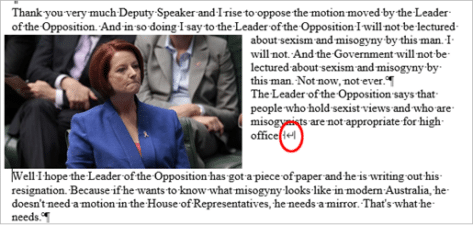
It’s easiest to remove a text wrapping break if you can see it, and to see it you need to turn on Show Hidden Characters under Home | Paragraph.

Now you can see the text wrapping break, just click before the break symbol and hit Delete.
Column Breaks in Word
Section Breaks in Microsoft Word
Text formatting in Excel with wrapping, line breaks and merging
Add a Manual Page Break in Word