In Microsoft Word, circling around text can place emphasis or enhance the text appearance. There are a few methods you can choose in Word documents and you’re not limited to circles.
We’ll show how to add a simple circle like this, plus a lot more.
Add shape to document
Go to Insert | Illustrations | Shapes
For our example we’ve chosen the Oval shape under Basic Shapes.

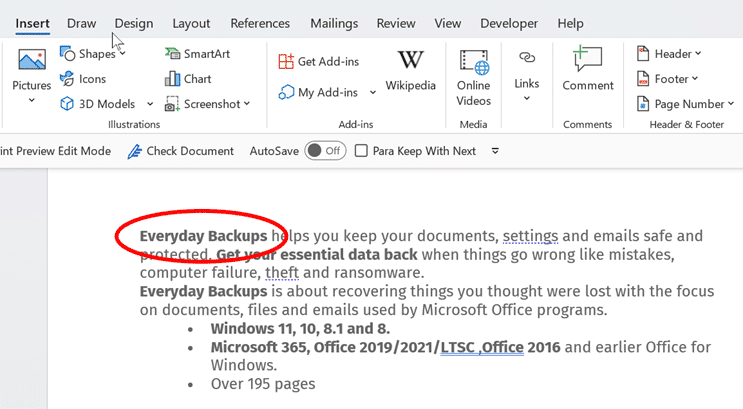
Now, hold down your cursor and drag the circle over the text.

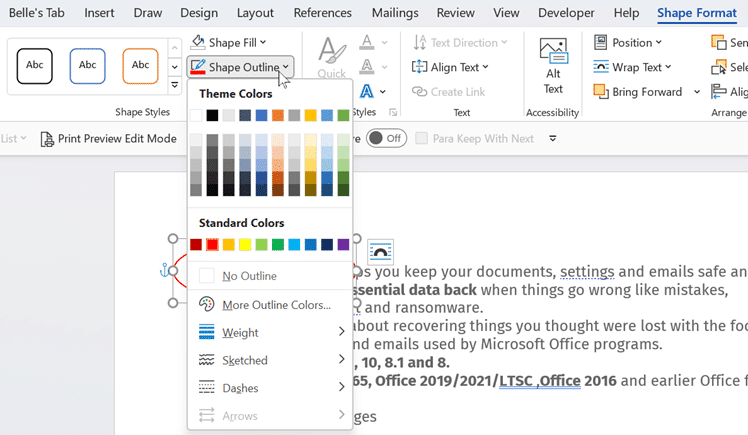
Now, make sure the shape has been selected. We change the formatting under Shape Format | Shape Styles to make it into a transparent circle.
- Shape Fill – choose No Fill, so that it doesn’t cover your text.
- Shape Outline – choose a color of your choice that will really stick out on the page.
- Weight – choose the thickness of the line.
- Sketched – add more of a sketched look to your line.
- Dashes – choose between different dashed lines.

Sketchy or hand-drawn effect
For a rough, hand-drawn line effect go to Shape Outline | Sketchy .

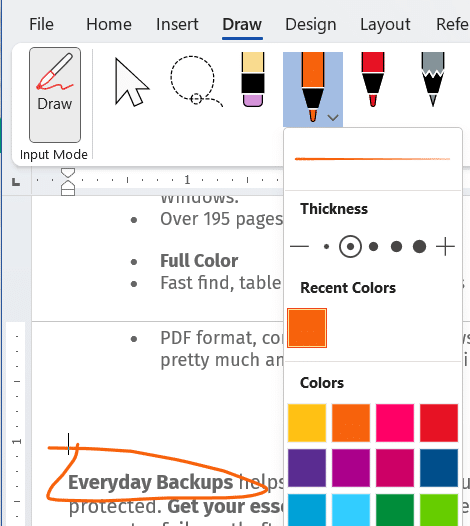
Really hand drawn shape
Yet another option is to really draw a line or shape around the words using the Draw tab. You don’t need a digital pen, just a mouse is enough. Go to the Draw tab, choose a pen, pencil etc and a color.
Add text within a shape
Another way around it is adding text within a shape. This means the text will move with the shape.
Go to Insert | Illustrations | Shapes.
Select your preferred shape.
Right click on the shape and select ‘Add Text’.
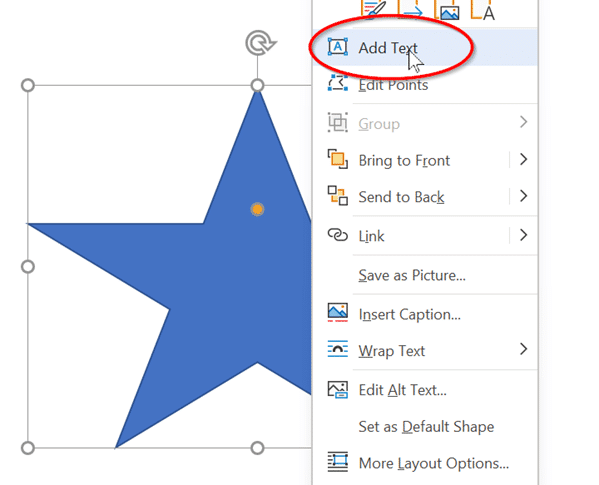
Type your text within the shape. If you need more room for text, drag the yellow dot up to ‘fatten’ the star shape

Double-click inside the shape to bring up options to change the Font style from the mini-toolbar. Of course all the formatting options are also on the Home tab.

Starting Word Page numbers from a specific page number
Make lines and arrows straight – a Word bug fix
Solved! How to connect shapes in Word