How to insert and use 3D models in Microsoft Office. 3D models let you rotate, pan and zoom all around an object to show it exactly the way you want.
Microsoft Office’s 3D models feature has more uses than you might expect. From the Microsoft promotion, it looks like 3D models are only good for interactive PowerPoint slides of buildings however 3D models can be used in ‘static’ Word documents, sheets or slides.
3D models are available in Microsoft 365, Office 2021 and Office 2019. A larger range of Stock 3D Models is available in Microsoft 365. Discover the secret powers of a 3D model
Get the exact view you want
Use 3D models to get a specific view of an object then take a screenshot of that view. Replace the 3D model with the static image. There are many different 3D model views possible by rotating, pan or zooming.
Let’s start with a 3D globe of Earth available from NASA, models of other planetary objects are also available.

Download the 3D model into an Office document, then rotate, pan and zoom to get exactly the view you want, like these two examples taken from the NASA model.

Insert a 3D model
Firstly, go to the Insert Tab | Illustrations | 3D Models

The drop-down menu will show the different options for getting 3D models, such as:
- This device – allows you to insert a 3D model you’ve saved on your computer.
- There are many 3D model files available online, for example the Smithsonian collection.
- Most 3D formats are supported, GLB is preferred (known to it’s friends as “Binary GL Transmission Format”.
- FBX, OBJ, PLY, STL and 3MF formats are also available.
- SketchUp format (SKP) was added to Microsoft 365 in 2022.

- Stock 3D Models – built in library of 3D models that you can choose from.
Stock 3D models
To get started, try one of the Stock 3D models provided by Microsoft. Microsoft 365 subscribers have full access to the stock 3D models.

Select the option that best fits your needs, then click Insert.
3D model ribbon
Click on a 3D Model to see its ribbon for options to manipulate the model.

Some of the options on the right of the 3D model ribbon might be familiar because they are available for all Word objects (Position, Wrap Text, Selection Pane etc).
Others are unique to 3D Models, they are mostly on the left side of the ribbon but don’t overlook the ‘Pan & Zoom’ button on the far-right.
3D Model Views
This section lets you manipulate the way your model appears on the page, such as:
Preset Views
Select the pre-defined viewpoints in the viewpoint gallery, such as top, bottom, left, right, front, or back. Quickly switch between different angles.

Custom viewpoint
If there’s an angle not available in the gallery rotate / tilt the 3D model to the exact angle and perspective you want.
Holding down your mouse on the middle symbol and move it around to change the perspective on the model.

For example, here’s an ‘undercarriage’ view of a (neutered?). giraffe

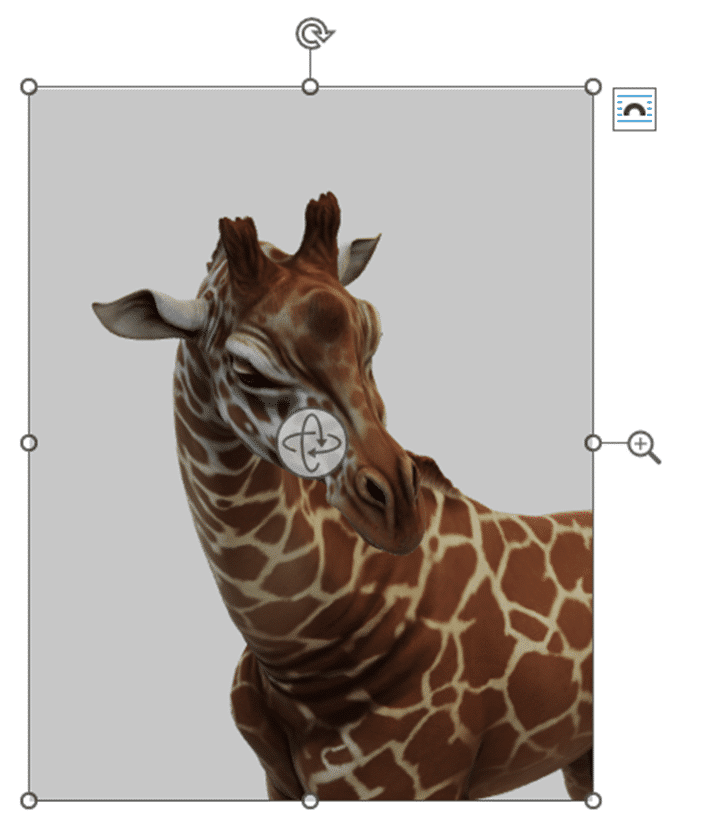
Pan & Zoom
At 3D models | Size is a Pan & Zoom option which is often overlooked. It lets you zoom in or out of the model.
Use the zoom slider (the magnifying glass at right) to get a closer or wider view of the model. Drag the image to pan around. In this example, we’ve focused on the ‘head and shoulders’, cropping out most of the animal.
More detailed 3D model controls
As usual in Office, behind the ribbon is a side-pane with more and finer settings. Click on the arrow and bottom right of the Model Views ribbon section to see Format 3D Model.

Change either the model rotation or the ‘camera’ or point of view to look at the model.
Adjust
Add another 3D model or reset the 3D model to its original orientation and position after it’s been adjusted.
Arrange and Accessibility
Easily position, align, and group 3D models with the same tools available to other objects in your document.
- Position – use this tool to precisely position and align your 3D model with other objects on the page.
- Wrap Text – provides different options for how text will wrap around the 3D models.
- Bring Forward / Send Backward
- Selection Pane – opens the selection pane up that lists all objects on the page.
- Align – align tools to align the model in relation to other objects on the page.
- Group – join objects together.
- Size | Height & Width – adjust the size of the 3D model.
- Accessibility – add alternative text.
Want more? Discover the secret powers of a 3D model
Use the Smithsonian for great photos and 3D models in PowerPoint and Word
SketchUp 3D graphics in Office 365
Get the most from Pie and Pizza Icons/SVG in Microsoft Office