In Adding Vertical Lines in Word we looked at the many common choices for lines down the page. Moving beyond that, let’s look at other, more interesting and creative vertical non-line choices to spice up a Microsoft Word document.
Sidebars
Sidebars are the starting point for many different design element options. You’re not limited to what Microsoft supplies, just use them as a quick starter.
Insert | Text | Text Boxes includes various preset options including some sidebars.

Use one of the sidebar options (like Facet Sidebar) as the starting point for your own vertical design element. Turn on the Selection Pane (Shape Format | Pane | Selection Pane) to see that the humble sidebar is quite complicated.

It’s a Text Box plus three rectangle shapes. Move, change or delete any of these to make what you want. For example, we’ve removed the text box, reduced the width of the shape then tinkered with the color and positioning to make a slightly bowing left bar.

Page Border choosing sides
Page Borders aren’t limited to complete boxes around the page, you can select the borders to appear left, right, top or bottom.
Don’t forget the ‘Art’ option which has various patterns available for the border sides.

If you scroll past the colourful and modern art options at the top of the list, there are more traditional border styles; old -fashioned, art-deco etc.

Like standard borders and shading, Page Borders don’t have to be complete boxes. They can be turned on/off for each side: left, right, top and bottom. Click on the sides in the Preview box to set what you want.

Vertical text in tables
Tables have a Text Direction option at Tables | Layout | Alignment | Text Direction.
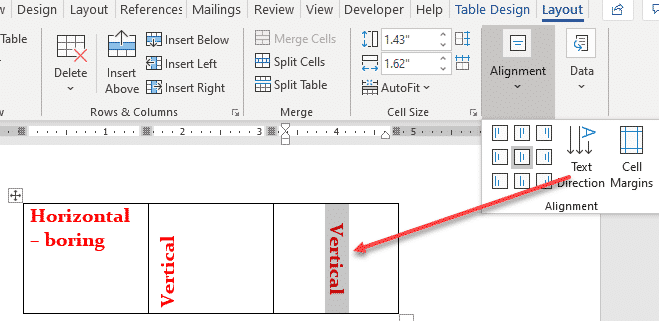
Next to Text Direction are buttons to change the cell positioning (center, left, right etc).
Use that to switch anything in the table (text, picture etc) to vertical, pointing left or right.
Custom Borders on Text Boxes
If you want a custom border that goes beyond the options in Borders and Shading | Page Borders, add a Text Box to the side of a page then fill with whatever you like.
Choose Insert | Text | Text Box | Simple Text Box then resize and reposition to the left or right of the page.

Text Wrapping defaults to On and Square which is what’s needed.
Change ‘Move with text’ to ‘Fix position on page’.
Click in the Text Box then look at the Shape Format tab for options to change the border/outline, fill and other settings. Text Direction is one to consider in this situation.

Once the Text Box is in place, change it and fill it with whatever you want. Remember that, despite the name, Text Boxes can accept pretty much any type of Word object including pictures and icons.

Five ways to add vertical lines in Word
Double Vertical Bar ‖ in Word, Excel, PowerPoint and Outlook
Broken Vertical Bar ¦ symbol in Word, Excel, PowerPoint and Outlook
Selecting a vertical column of text