It’s possible to add a virtual background of your choice to a Microsoft Teams video call or just blur the background for a little privacy.
Microsoft hastily added some virtual background options to Teams but the whole calling part of Teams is still woefully inadequate. For example, many of the video settings aren’t selectable until you’re in a call! Little wonder people prefer to use Zoom or Skype over Teams.
Speaking of Zoom, Microsoft rushed out a half-baked virtual background and blur background option for Teams video. Whether it’s available depends on which device you’re using, the version of Teams and possibly the position of sun & moon.
In a Teams video chat, look for the three dots indicating a further menu, then choose ‘Show background effects’. There should be a blur option even if there are no virtual backgrounds.
Limited selection
We said this was released hastily and an example of that rush is that users are currently, officially, limited to a selection of backgrounds provided by Microsoft.

Click Preview to see a larger version of the background.
Apply will return you to the call with selected background.
Blurred background
There is a blur background option, but it might not be obvious. Next to the ‘no background’ option at the top is the blur choice though there’s no label to explain that.

The larger preview is a better example of the blurred image.
Add your own background
While Microsoft hasn’t officially allowed people to add their own backgrounds, they’ve made it fairly easy to do.
Firstly, start a Team video call and choose the ‘Show background effects’ option mentioned above. Choose a background and apply it. That creates the necessary folder and sets up a single background .PNG file.
Next, choose or make your background image. It’s best to copy the type and dimensions of the installed image. In our tests it was a .png file 1920 x 1080
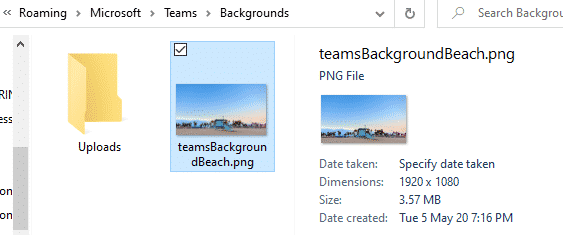
In Explorer, go to %APPDATA%\Microsoft\Teams\
Then look for a folder called ‘Backgrounds’. If there’s no such folder, then Teams hasn’t yet used the virtual background selector. Try again as explained above.
Go to the ‘Uploads’ folder and paste your image/s into that folder.
Go back to ‘Show Background Effects’ and scroll down to the bottom of the list to see your additional backgrounds.
Choose Preview to make sure the image appears as you’d expect.
Flipped Image
In our tests we noticed a strange behavior. Teams flipped the image vertically from how it looks in other image viewers. The same image appears correctly in Explorer and the Win10 Photos app so the bug is in Teams.
We’re not sure why but it’s a good example of why testing is always a good idea.

If that happens, just resave the image flipped to workaround this Teams strangeness.
Where to find a virtual background
We prefer to use our own photos as custom backgrounds. Most digital cameras and smartphones save images large enough to use a virtual backgrounds.
Otherwise there’s a whole Internet worth of images to choose from Star Wars or London Transport.
Why PowerPoint Video Backgrounds Should Be Banned
Getting More from PowerPoint Designer