Adding a picture to PowerPoint text background look great and is easier than you might think. Even better, are many hidden options to adjust the image and position it exactly as you want.
Curious about how to create text effects like in the image below? Look no further—if you have PowerPoint, you can easily do it as well.

Find and save the image you intend to use as a fill for your text. For this type of project, it’s ideal to select a clear and easily recognizable image or a pattern that matches the color scheme of the organization or product.
Adding and Formatting Text
Launch PowerPoint and insert your text to which you want to apply the effect.
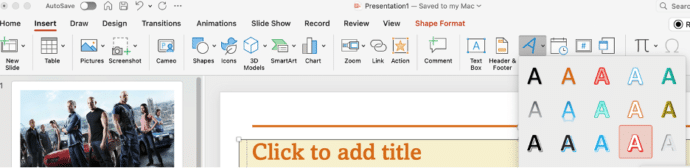
Navigate to the Insert tab and click on WordArt to select a Text effect.
Next, type your text and choose a font. I recommend using a large and bold font to make the image more visible.

Text Effects
Now, let’s fine-tune the settings to enhance the text effects, all these are our choices and you’re welcome to choose whatever suits.
Adjust the font size and boldness to your preference .
Use the small squares on the edges to resize and reposition the text image as needed.

Then, go to the Shape Format tab and click on the ‘A’ icon to format the text. From there, select your preferred text effect style from the available options.

The image below showcases the Transform style ready for an image to be added.

Add picture to text
To further enhance the Text effect. Right click on the text image and select Format Text Effects.
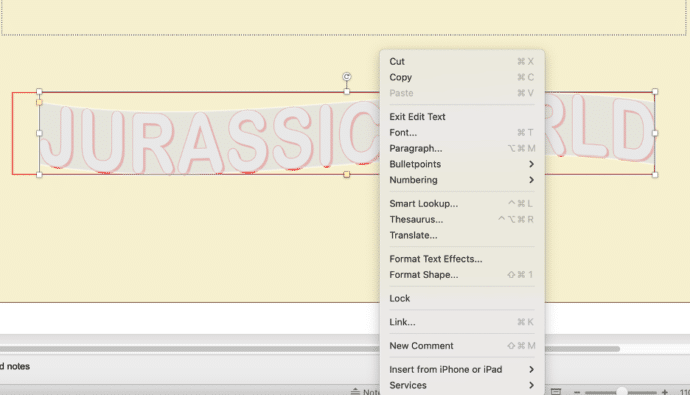
Select the Shadow options and change the shadow color to black or any other color of your choice. Then, adjust the settings by setting the Angle to 130 and the Distance to 9 pt. Feel free to set it as per your preference.

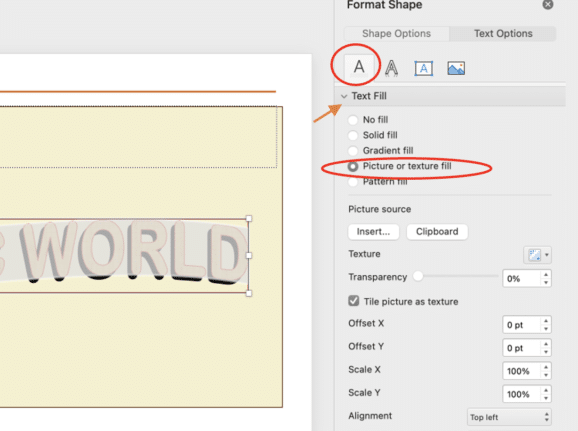
Now, go to the ‘A’ icon and select the Text Fill option to expand the list. Then, click on the “Picture or texture fill” radio button.
Picture fill for text
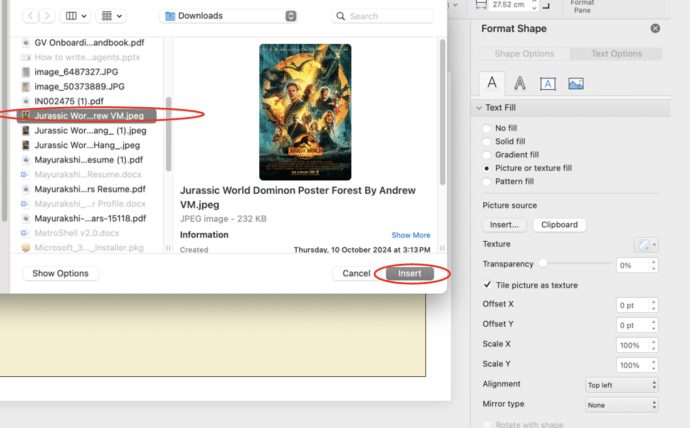
You will find an ‘Insert’ option beneath the Picture Source tab. Click on ‘Insert,’ and a dialog box will pop up, enabling you to select the image saved in your folder.
You’re all set! Feel free to add any extra text or designs to achieve the desired look,

More Picture Fill options
Format Shape | Text Options | Text Fill has some more options to tweak the image behind the text.
Transparency will lighten the image (depending on the color behind the text). This example shows the first word with 70% transparency for comparison.

Choose ‘Tile picture as texture’ to release choices to position the image and what appears in the text fill. In this example we’ve tweaked the image so faces appear.

Offset X or Y – move the image left/right, up/down.
Scale X or Y – ‘zoom’ the image left/right or up/down.
Alignment – top, center, bottom, left, right combinations.
Mirror – Horizonal, Vertical or both