Those ‘award’ logos with the laurel or fern on each side can be made in Word or PowerPoint. The ‘awards’ can be serious or joking.
Here’s the thing we mean, you’ll often see them on theatre or movie posters.


Format
The standard wording for these logos is:
Award organization (Academy Award, Pulitzer, Tony, BAFA)
The organization might have a specific wording, font or logo.
Type of award (Best Picture, Best Novel, Best Musical, Best Actor)
Status (Winner, Nominee, Short Listed)
Some include the name of the work while others don’t because it’s part of a larger poster, handbill or document.
The award and status lines (2nd and 3rd) should be in the same font but different sizes. Usually all caps.
Font
Sans-Serif fonts are most common though serif fonts are also possible, see the ‘Oxford’ example above.
Laurel or Fern
First find a laurel or fern for each side of the logo. There are many available online either as a complete image or just one side. Either way is OK. We’ll show how to make a two-sided laurel into a single-side one that can be separated to each side.
Laurels are available as an SVG or PNG, we prefer SVG’s (Office 2019 or Microsoft 365) because they resize better. Use ‘as is’ or make two copies, each showing one side. A Google Image Search for ‘award laurel’ will show many, many choices.
A two-sided image can be split (if necessary) into two parts which gives more flexibility for the size. Make two copies of the original laurel then crop each version to make mirror-images (left and right laurels).
A single sided laurel can be copied and flipped horizontally (the Picture tools in Word or PowerPoint) to make a matching set.
Word has an Icon which can be used, it’s in the Celebration group (Office 2019) or two versions in Word 365 (search for laurel).
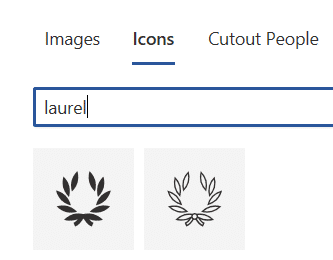
The advantage of SVG graphics (Icons as Microsoft calls them) is they can be resized without losing quality. Icons can also be recolored from Word’s Graphics ribbon | Fill.
See Edit options for SVG Icons in Office 365/2019
Use as a single object with a join at the bottom. Then add a text box with no fill with the text you want (see below).
For a split laurel (i.e. gap at the bottom). Copy the icon then crop each one to remove the unwanted half then put the two objects side-by side. This is the Office/Microsoft 365 Icon copied and split into two parts with different colors.

Alternatively, we found this nice single laurel at Pinterest. Make it double-sided by copying the image alongside the original then Picture | Arrange | Flip Horizontal.

Making an award logo
Now let’s put all these elements together. Our suggestion uses a table to position the side images and bottom text, if any. Text box contains most of the text.
It’s not the only way to do this, but it’s deliberately flexible and adaptable. For example, the three column table lets you adjust the spacing between the two images/ferns from almost nothing to very wide, simply by changing the width of the center column.
Table for the images
Insert a table with three columns and a single row. Remove the table borders (inside and outside) but leave the gridlines on so you can see what you’re doing.

Insert the laurel/fern images into both left and right column.
Center column
Change the width of the centre column to suit. A really narrow column means the two images almost touch. Or wider if you need room for text. If you wish, delete the center column completely but we prefer to leave it and make very narrow to leave the option for widening the column later.

Any text between the two images can be added to the bottom of the center column. There are two ways to do that
- Align the column/cell to Bottom – Center

- OR Split the centre column into two rows. Change the height of the bottom row to fit the text. The upper row is just blank.

Text Box
Most of the text goes in a Text Box that overlays the table. Center the text box within the table and sized to take up all the space you need for words.

The vital first step is to change the text box fill setting to ‘No Fill’. That lets the table images show through the text box.

In PowerPoint
It’s the same in PowerPoint. Add a table, insert images then overlay a text box.
The award goes to
Here’s our final award logo with the table gridlines and text box visible.

With that basic setup in a table, you’re free to adapt to whatever specific look you need.
Word tables for formatting magic
Merge or Split cells in Word tables
2001 A Space Odyssey – in Word and PowerPoint
Make your own White House notepaper with Microsoft Word