We already talked about the Microsoft Word ‘Shrink One Page‘ feature and its limitations. Here’s suggestions for how to move a few orphaned lines from the top of a page in more subtle and effective ways.
Obviously, every document is different so the tricks you use depend on the situation. Pick and try from this list of ideas which move from tiny changes to larger savings in vertical space.
Look at the last page or two
The place to make changes the last few pages of a document. Removing vertical space earlier in a document usually doesn’t have a direct impact on pagination many pages later.
Word has multi-page views so you can see the overall look of a page and maybe identify where some vertical space can be saved.
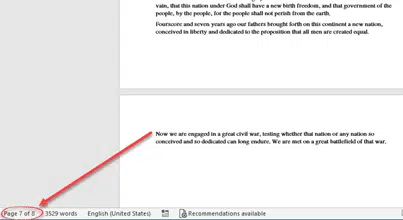
Or just look at the page count at bottom left of the Word status bar. Look for when your changes make the total pages drop by one.
Orphan control
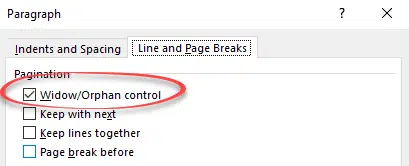
Word has a setting to prevent paragraph ‘orphans’ where the last line appears at the top of the next page. Check the overall paragraph settings or just the settings on a last paragraph to ensure Widow/Orphan control is ON. Look at Home | Paragraph | Line and Page Breaks | Widow/Orphan control.
This and other suggestions use the full Paragraph settings, not just the ones on the ribbon. Reach the Paragraph settings dialog box from the little arrow button at bottom right of Home | Paragraph.
Widow/Orphan control is normally ON but, if not, that quick change might solve the problem.
Reduce picture or chart sizes.
If there’s a picture or chart, try reducing its size a little. That often gives enough extra space.
Heading spacing
Word’s default headings have large spacing before the text and multiple line spacing. Heading 1 has a default 12pt spacing before the text and multiple line spacing.
Look at headings on the last or second last full page, try shaving a point or two from the ‘Before’ or ‘After’ settings or the Multiple line setting. Look at Home | Paragraph | Indents and Spacing | Spacing.
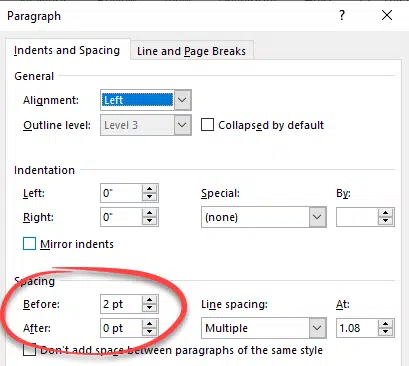
Small changes won’t be noticeable overall.
Use Show All
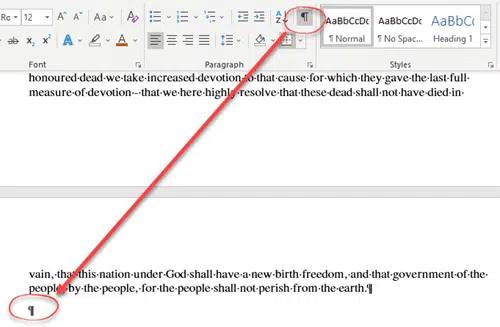
Don’t forget the Word’s users friend ‘Show All’ which reveals paragraph marks, line breaks and other hidden characters.
In this example Show All reveals a paragraph mark at the very end of the document, which happens quite a lot but usually doesn’t matter. Remove the paragraph mark and the extra page problem is partly solved.
Look for line orphans
Check the text on the last page. Are there paragraphs with just a word or two on a separate line at the end of a paragraph? Shortening the paragraph can remove the extra line used and gain some vertical space.
Obviously, you should not do it with a famous speech or quote, as we’ve done in this example.

Removing one word and a duplication is all it took to reduce three lines to two.
Reduce paragraph spacing
For the last few paragraphs slightly reduce the paragraph spacing. Select the last paragraphs then Home | Paragraph | Indents and Spacing and check the Spacing Before or After settings. In our Normal template that’s set to 8pt. Try cutting it back to 7pt or 6pt which might be enough to fit it all at the bottom of the page.
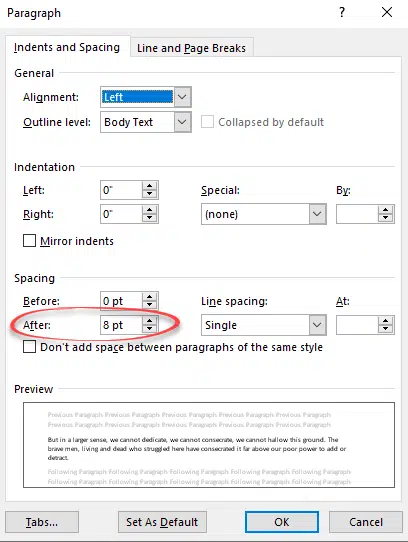
A slight change in the spacing of a few end paragraphs is more subtle than a change in spacing for all document paragraphs.
Top / Bottom Margins
A document with a few pages can be made to fit simply by reducing the top or bottom margins by a little. Go to Layout | Margins | Custom Margins. It might not take a lot, just shaving one margin from 1″ to 0.75″ could be enough.
Word has a ‘narrow margins’ option to try but it might be more than you need.
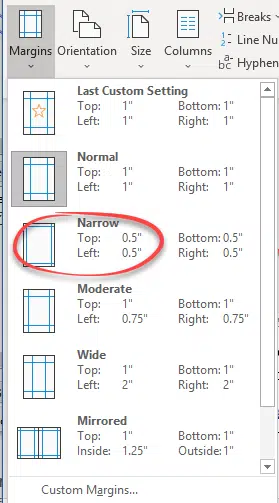
Adjusting the left/right margins can also help fit more text on a page but it’s less direct than the top/bottom margins.
- Shrink One Page or Shrink to Fit in Microsoft Word
- Delete an Empty or Blank page in Microsoft Word
- Preventing Table overrun to blank page in Word