Outlook for Windows doesn’t have a direct way to rename an Outlook Profile but it’s still possible.
Outlook for Mac, on the other hand, can rename a profile from the Manage Profiles list.
Properly label a Profile instead of using the one or two word names Microsoft defaults to.
This is a Windows registry change so the usual warnings apply. Be careful, backup the registry first, still be careful, look both ways before crossing, leave the seat down etc.
Make sure Outlook is fully shut down.
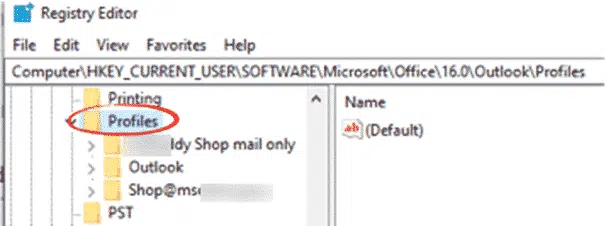
Start the Registry Editor (regedit) and go to
Computer\HKEY_CURRENT_USER\SOFTWARE\Microsoft\Office\<version>\Outlook\ProfilesOutlook 365 and Outlook 2016
Computer\HKEY_CURRENT_USER\SOFTWARE\Microsoft\Office\16.0\Outlook\ProfilesOutlook 2013
Computer\HKEY_CURRENT_USER\SOFTWARE\Microsoft\Office\15.0\Outlook\Profiles
Under that label all the profiles are listed.

Right-click on a label and choose Rename. We’ve changed the profile from the useless default ‘Outlook’ to something clearer.

Default double check
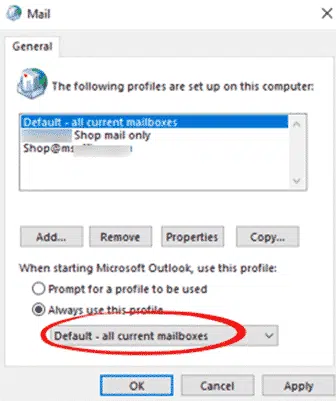
If you’ve renamed the default profile that Outlook uses at startup, go to Control Panel | Mail | Profiles to make sure the renamed profile is showing under ‘Always use this profile’.

In our tests, Outlook worked with a renamed default profile automatically, but it’s worth checking. Otherwise Outlook might try to start using a profile name that doesn’t exist.
See Outlook Profiles, important and useful but little known
Outlook for Mac Profiles, finding and using them