It’s easy to share appointment details with other people, whether they use Outlook or not. No need to type in appointments when you can send and receive the details right in your calendar. We’ll explain how it works for both sender and receiver (organizer and invitees) on various platforms, including Outlook.com and Gmail plus the best way to get started!
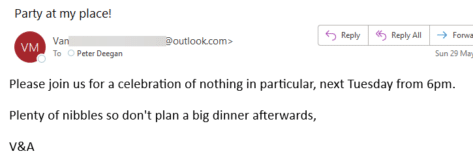
I suppose we’ve all received emails like this which we then have to manually add to a calendar in Outlook or some other app.
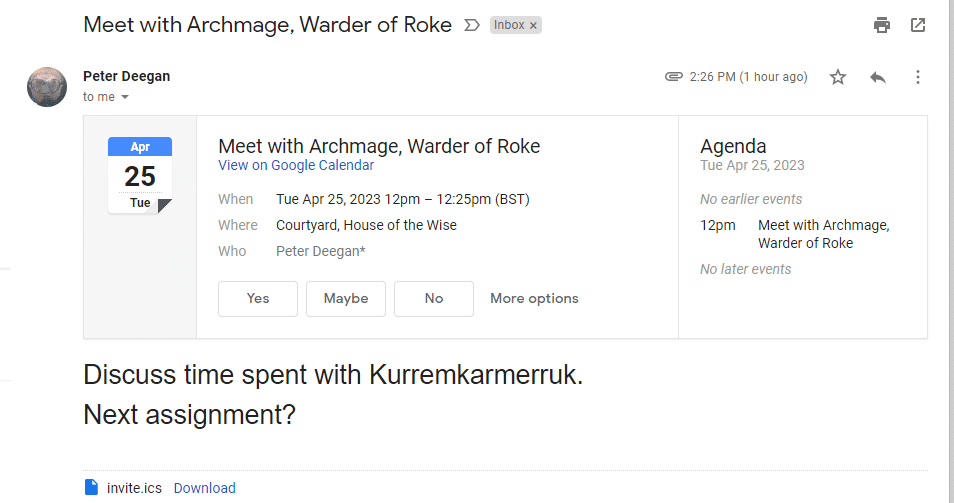
A better way to receive an invitation is like this:

This has many advantages for both sender and receiver:
- Each invitee can choose Accept or Tentative and the event is automatically added to their own calendar.
- Outlook will warn you if there’s a conflict between the new invitation and your existing calendar.
- No manual typing of calendar entries required. Much less risk of errors.
- The sender gets an automatic response or RSVP so they know who is coming. There’s a list of who has replied and their response.
- Invitees can include a personal message in the RSVP or just let the two machines handle it <g>
- Changes to the appointment are also automatically sent to all invited and their calendars updated (after checking with each receiver/invitee).
Microsoft has built some fancy appointment stuff into Outlook with shared calendars, resource allocation and all manner of gizmos. That’s all wonderful in companies which have all the back-end support for such things.
Most people don’t need all that stuff. Outlook desktop Windows & Mac, Outlook on the web and many other mail services have a simple cross-platform system that’s been around for years and works really well.
The problem? Not enough people use shared appointments!
Not just meetings, also friendly lunch, dinner etc
Firstly – I’ll talk about meetings and appointments, even though it sounds all business-like and formal. Personally I use these features for much more important and vital arrangements like theatre and dinner dates with friends <g>.
Second – these features work best with anyone who uses Outlook (any version but preferably Outlook 2007 or above, but not Outlook Express) and uses the Calendar feature. Sending/Receiving appointments has been in Outlook for well over a decade, the screens might look a little different but the basics haven’t changed.
If the people you send appointments to don’t have Outlook they’ll still see the message.
SENDING AN APPOINTMENT
Outlook lets you create an appointment in your calendar then email the details to other people. When they receive that message they can read the details but if they use Outlook there’s bonuses.
- the receiver can add the appointment to their Outlook calendar automatically, just click on buttons on the top of the message to accept, decline or accept tentatively.
- the acknowledgement sent back to the sender automatically updates the sender’s calendar. In effect the sender can track RSVP’s automatically.
If there are changes to the appointment – a change of time or venue then the change can be sent around to all concerned and their calendars will be updated.
HOW TO SEND
To send an appointment you first create the appointment (not the email – Outlook will do that for you).
Go to New | Appointment. Fill in the subject, location, times etc. Since other people will see these details you might put in more details than you might for something you’d just read yourself. AND don’t type anything you don’t want others to see.

Tip – anything you put in the large text comments area will go with the invitation. It’s a good place to put extra info like directions to the meeting place. You can also attach images (say a street map or link to online mapping) in this area.
Then click on the Scheduling tab. This is the part that seems overwhelming; in an integrated office with shared calendars for all you can list people or resources and check availability – there’s even an Autopick option to choose the first available time for all the people your list. That’s great for meetings within an organization which has Exchange Server, shared calendars and resource/room allocation online.
We mere individuals don’t want to worry about all that. Just focus on the Attendees list at left.

Just enter the names of the attendees, one per line. Type in names just like you would for an email message, and they will be resolved to Contacts in the same way.
Type an email address for anyone not in your Contacts list.

At left of the attendee list is a check-box for each person, that indicates if an email invitation will be sent to that person. UNcheck the box if you don’t want an invitation sent. The person is still on the attendee list but won’t be automatically notified.
( You may get a prompt to join the Microsoft Office Internet Free/Busy service – click the ‘Don’t show this again’ box then Cancel. )
Once the appointment details and invitation list is ready, choose Send from the toolbar. The appointment will appear in your calendar and messages will go out to the invitees. You can see the outgoing emails in your Sent Items folder, as usual.
How is the appointment sent – .ICS
There’s no special magic done by Outlook and nothing Microsoft exclusive either.
The invitation emails are normal messages with a small (tiny) attachment called a .ICS file.
.ICS is an open and commonly used format for sharing appointment info. If you’ve ever seen a web site offering to add an event to your calendar, it’s almost always using .ICS.
See Add an iCalendar .ics to an Outlook calendar but be careful
ICS files are plain-text and quite safe.
HOW TO RECEIVE
If you’re on the receiving end of one of these Outlook generated invitations you’ll see an email with some extra options. What the receiver sees depends on their email software and how it reacts (or not) to an appointment .ICS in the message. Most email & calendar systems accept incoming .ICS including Microsoft hosted mailboxes, Outlook.com and Gmail.
Broadly, each receiver should see options to Accept or Decline the appointment. If Accepted the event is added to their calendar.
Here’s how an incoming invitation email appears in some common mail systems.
Outlook for Windows / Mac
In the Outlook preview pane you’ll see the date, time and location of the meeting. Above that are some buttons – Accept, Tentative, Decline, Propose New Time and a link to your Calendar.

Note: this view is a little different for each version of Outlook – the above list of buttons is from Outlook 365 for Windows, earlier versions might not have all these choices.
In recent Outlook’s, for each option there’s a pull-down menu. You get the option to
- send a response
- not send a response
- edit the response before replying
Accept – the appointment will be added to your calendar and an RSVP sent back to the sender. .
Tentative – the same as Accept except the appointment is added but only with Tentative status in your calendar.
Decline – nothing is added to your appointment, you can choose to RSVP and explain your inability to attend or to do nothing in response.
Propose New Time – the schedule window will appear and you can select an alternative time or date. This is then sent back for consideration.
Calendar – just opens a window on your calendar so you can see what’s already booked.
Outlook on the Web – Outlook.com etc.
It’s similar for Microsoft hosted mailboxes (including Outlook.com) when viewed with Outlook in a web browser.
Instead of Accept, Tentative, Decline, in Outlook.com it’s called RSVP then Yes, Maybe or No but it amounts to the same thing.

Choose Yes or Maybe and the event will be added to your calendar. The organizer will receive an email with your response.
Gmail
Gmail also understands .ICS attachments/invitations. There are the same Yes, Maybe, No responses available and the event will be added automatically to your calendar.
CHANGES
If anyone in the invitee list changes the date or time of the appointment they’ll get an option to notify everyone else on the invitation list. This can be handy when plans can and do change.
For any change, a message should go out to all invitees to update their calendar.
Appointments do not have to be single events – recurring events can also be scheduled this way. I have a weekly exercise and dinner arrangement that is managed that way – when someone can’t attend for a single week our respective calendars are updated.
WHO’S COMING TO DINNER?
The sender of the invitation can open their copy of the appointment at any time, click the Tracking tab and see who has RSVP’d under the Response column.

You can manually change the response for anyone who can’t respond automatically (or engages in that old fashioned habit of calling on the phone to thank you for the invite).
You can also add or delete invitees at any time with invitations or updates going out as required.
The best way to learn about sharing appointments
The best way to get comfortable with appointment sharing and calendar integration is to try exchanging appointments with a friend.
Get someone you know to send a fake appointment, you can send one in return. Each of you can see the incoming event message and how your Outlook or other email system reacts.
First look at the new Microsoft Outlook – New Outlook
Too many Microsoft Outlook’s – we explain them all
All the email preview options in Outlook
Add an iCalendar .ics to an Outlook calendar but be careful
See multiple calendars in Outlook