Using simple animations in PowerPoint presentations is relatively easy, but you can also take them to the next level, to jazz up your photos in PowerPoint. Using this method might take a few more steps than just creating a straightforward animation, but the result is well worth it …

In short
We’ll explain how to select part of an image (the water section) then split the image into two parts using Shapes | Intersect. Finally add effects and animation only to the selected part (water) of the picture.
This article shows how part of a slide component (a picture) can be selected and animated separately. Normally Animations are used over an entire slide or element.
Create the base
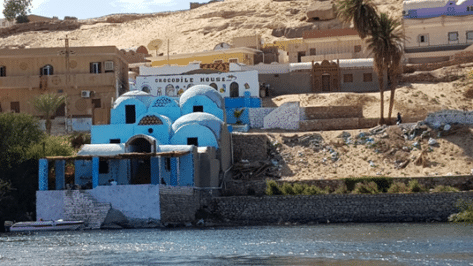
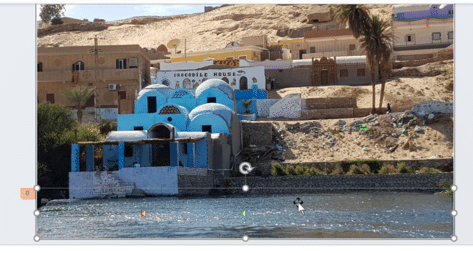
Here is Peter’s amazing vacation photo that we’re going to jazz up, by making it look like the water is actually moving!
Firstly, you’ll need to create the base for our animation, simply open a new PowerPoint presentation and go to Home | Slides | Slide Layout | Blank.

Next, insert the image into the PowerPoint slide, you can do so using a simple copy and paste (Ctrl + C and Ctrl + V) or go to Insert | Images | Pictures.
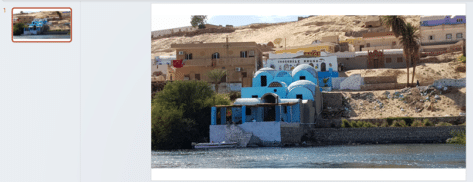
Now your picture might not completely fill the slide once inserted, but you can adjust manually yourself by dragging the corners of the image.
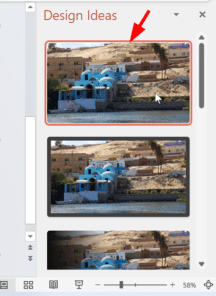
In our case, Design Ideas appeared on the right-side of the screen and we were able to click the first option which filled the slide with the image.
Duplicate Slide
Next, right click on the slide in the left-hand column, and choose duplicate slide.
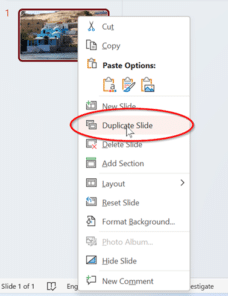
You don’t need to duplicate the slide but it’s a good idea, just in case things go wrong you can quickly return to the original image.
Select part of the picture
Click on the second slide, then go to Insert | Shapes | Lines | Freeform: Scribble
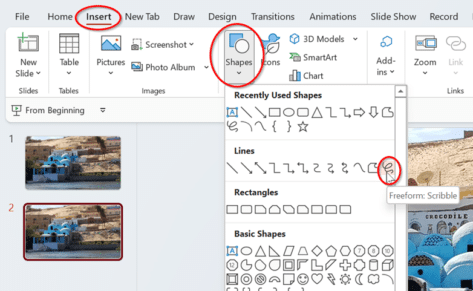
Now on the second slide we can draw around an area that we want to bring to life, in this case we will draw around the water. You’ll need to hold down the mouse button to draw the area, before letting go to create the shape.
It doesn’t need to be perfect, we can fix the edges up later.
Now you need to click on the background first, then hold down the shift key and the shape you’ve just drawn so that both objects are selected. Go to Shape format | Insert Shapes | Merge Shapes | Intersect.
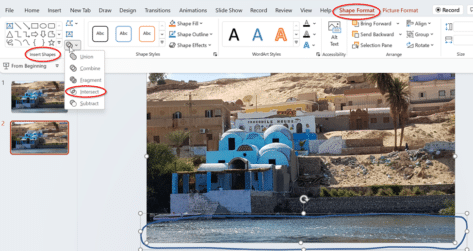
This will remove the background and leave only the area of the shape. From here, we can apply soft edges to the cut-out image.
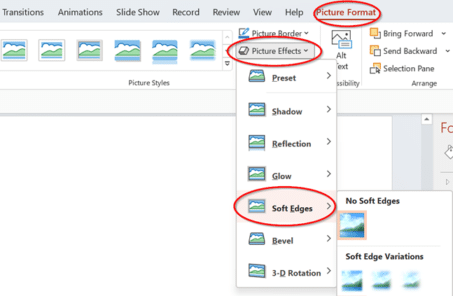
Add Soft Edges
Go to Picture Format | Picture Styles | Picture Effects | Soft Edges | Soft Edge Variations and select your preference, in our case due to the size of our image, we selected 2.5 Point, this can be increased or decreased depending on the size of the area.
Next, we can cut the image (Ctrl + X) in the second slide and paste it (Ctrl + V) into the first slide. This will paste the image directly on top of the existing slide. Now we can delete the second slide.
Extra expert tip
Before continuing, it’ll be easier if we can distinguish between the added image and the background. Firstly, right click on the image we recently pasted into the PowerPoint slide and select Format Picture.
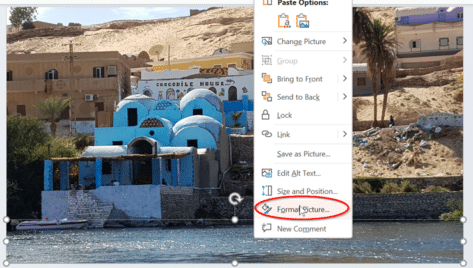
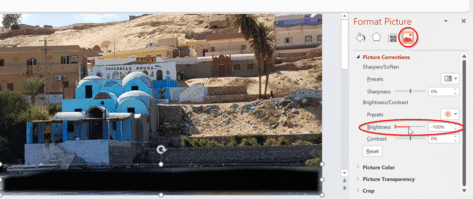
Go to Picture | Picture Corrections and change Brightness to -100%. Now it’s easier to differentiate between each image.
Add Animations
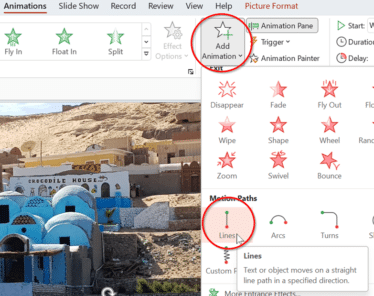
There are plenty of animation options to choose from to jazz up your image. Some will be more realistic than others, so you’ll need to choose the right one, depending on your end goal. For our example, we’ll be adding the ‘Lines’ animation, so that it will add the effect like the water is moving on screen.
Make sure you first select the dark shape, then go to:
Animations | Advanced Animation | Add Animation | Lines
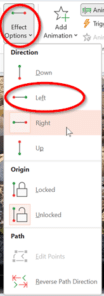
Here it will show you the direction of the lines on the screen, but you can change this by selecting Effect Options. By default, it will be in the Down direction, for our example we have chosen the Left direction.
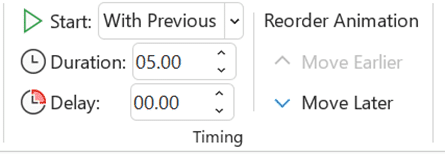
Timing
The timing of your animations is also important. In the Timing pane there is the:
- Start – choose when the animation starts, either on click, with previous or after previous.
- Duration – how long you would like the animation to last.
- Delay – how long you would like to delay the start of the animation.
- Reorder Animation – adjust the animation to earlier or later in the animation pane.
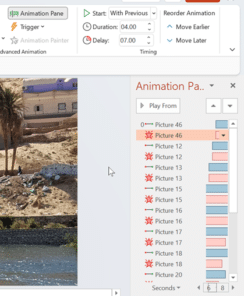
In our example, we have changed Start to ‘With Previous’ and the Duration to 05.00 seconds.
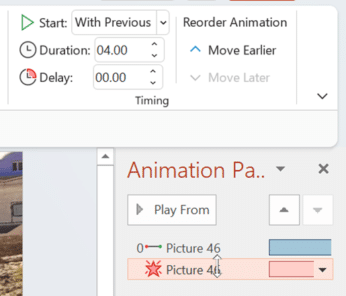
Next, we have also chosen to also add the Fade animation, this will ensure to add smoothness to our moving water. We’ll click on our darkened image and go to:
Animations | Advanced Animation | Add Animation | Exit | Fade
We have chosen Start as ‘with previous’ and duration of 4.00 seconds (we want to be fairly close to the duration of our Lines animation). This’ll be shown in the animation pane like below.
Now we can adjust the image back to normal brightness. Right click on the image and go to Format Picture | Picture | Picture Corrections and change Brightness back to 0%.
Lengthen the effect
Now that we’ve created the animation, we might want it to last longer than the short duration already set up, and for it to look like a continuous animation as well. We can do this by duplicating the image and changing the delays for each pair of animations.
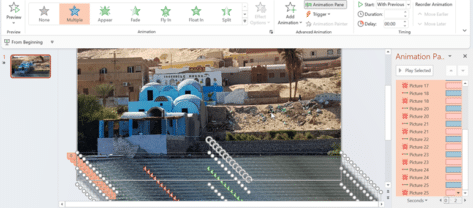
Firstly, select your image, then press Ctrl + D (to duplicate) approximately 10-15 times. This will duplicate the image including the animations.

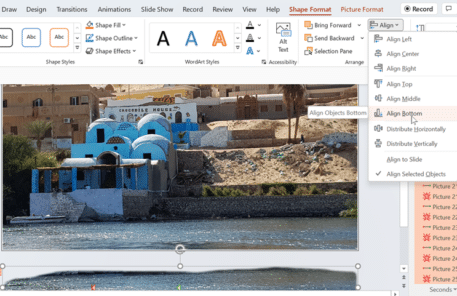
Next, press Ctrl + A to select all images and their animations within the PowerPoint slide. Hold down shift and then click on the background to deselect the background only.
Go to Shape Format | Arrange | Align | Align Left and then Align Bottom
Hover your mouse over the cut out and drag/move the image so it is placed exactly on top of the same area on the background.
Go to your Animation Pane, scroll down to the bottom, highlight the bottom two animations, and add a delay on 00.50 seconds.
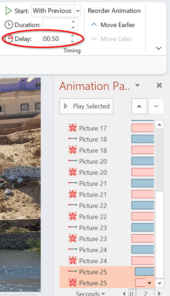
Do this with the remaining pairs, making sure to add an additional 00.50 seconds to each pair. For example, 01.00, then 01.50, then 02.00 and so forth, until you reach the top of the pane.
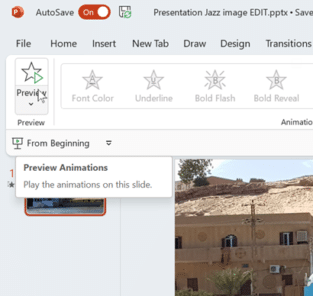
Now press the Preview button in the top left corner or hit F5 to go full screen to test out your animation. You can go back and make any adjustments if needed.