As a quick example of what’s possible, here’s a quick look at some photo editing options in Microsoft Office, Word, Excel, PowerPoint or Outlook emails. Since it’s Christmas, we’ll use one of the famous Apollo 8 Earthrise images.
We’ve already talked about how Apollo 8’s Earthrise, as we know it, is a cropped, rotated and color adjusted version of the original photo. See Get the real, original Earthrise photos from Apollo 8

Office image editing is powerful enough to do the same picture adjustments in a few minutes.
For this example we’re going to use the ‘other’ Earthrise photo known as AS-14-2324 . It was taken a few seconds later using slightly different camera settings.
Office photo editing
Microsoft Office has some picture editing tools that are worth keeping in mind for quick jobs.
Insert the image into your document, worksheet, slide or email and click on it. The same Picture Tools | Format ribbon appears in Word, Excel, PowerPoint or Outlook. There are small feature differences depending on the version of Office and Windows/Mac.

Rotate
Image rotation is on the Picture Tools | Format | Arrange section of the ribbon.

- Rotate Right 90°
- Rotate Left 90°
- Flip Vertical
- Flip Horizontal
- More Rotation Options, opens the Picture Layout | Size dialog to rotate by a number of degrees.
All we need is a simple ‘Rotate Right 90°”
Crop
Office has many image cropping options at Picture Tools | Format | Size

We need the first ‘Crop’ option that puts eight handles around the image.
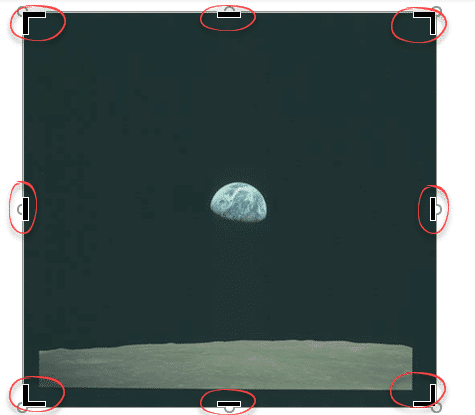
Use the handles to crop the image down to what you want to see.

Office shows the full image ‘behind’ the cropped image.
Tip: Undo (Ctrl + Z) works for each move within a cropping session.
Click outside the image to finalize the crop.
Color Adjustment
The final step is color adjustment. We want to make the background proper black, not the browny haze caused by the camera and film. That is not a critique of Bill Anders, taking photos is very hard with such high contrast between the truly black space and bright Earth/Moon.
Go to Picture Tools | Format | Adjust | Corrections. This is where two Office features come in really handy – Gallery and Live Preview.
Office shows you Gallery thumbnails of the image corrected in various ways – Sharpen, Soften, Brightness and Contrast.

Live Preview changes the image in the document. Hover over each thumbnail to see the complete change in the image. We found a close match to what we wanted.
For more precise adjustment, choose ‘Picture Correction Options’ at the bottom of the gallery. That opens the Format Picture Pane where you can change the sharpness, brightness or contrast by precise amounts.

See also:
Get the real, original Earthrise photos from Apollo 8
2001 A Space Odyssey in Word and PowerPoint