How to Show and Customize Gridlines in Microsoft Word
Word gridlines help you align images, shapes and text boxes on a page but finding the settings to customize them isn’t obvious. Here’s how to turn gridlines on, control the spacing, show only horizontal lines and work around the limitations Microsoft still hasn’t fixed.
At first, the lines look like this which seems way too much for most purposes with vertical and horizontal lines that are too close together. There are options to make gridlines more useful but those choices are nowhere near where you turn the feature on/off.
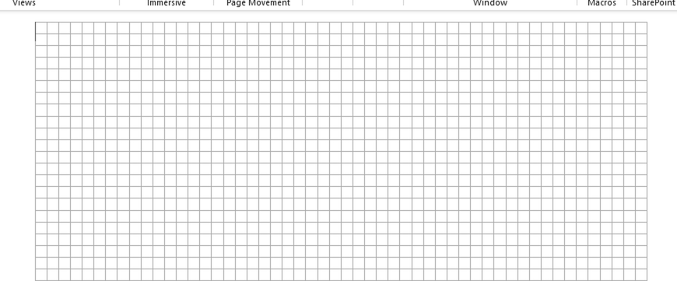
The Gridlines box on the View tab turns on Word’s drawing grid.
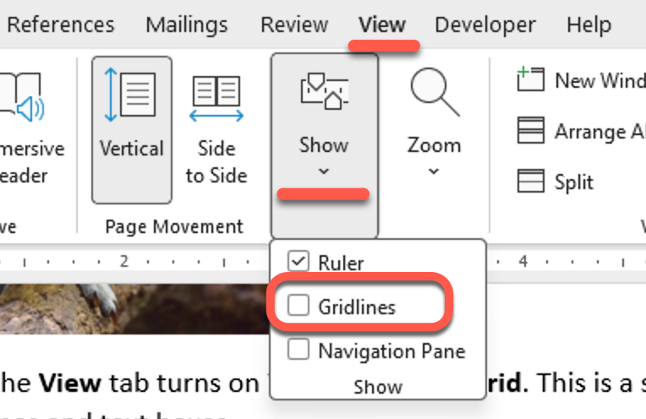
The lines are only a visual guide and can’t be printed. Turning them on doesn’t change your document, so you can experiment freely.
The settings to control the vertical or horizontal lines and spacing are on another tab and buried deep in a long menu.
How to show only horizontal gridlines
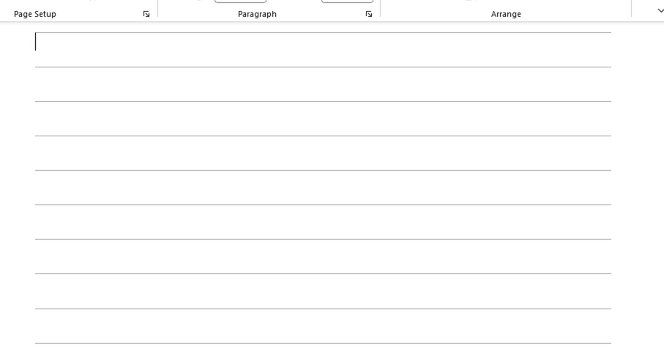
The setting is in the grid dialog. A check box called Vertical every controls the vertical lines. Clear it and only the horizontal lines remain.
Word for Windows
- Go to the Layout tab | Align in the Arrange group | Grid Settings. The same Align button is on the Shape Format and Picture Format tabs when an object is selected.
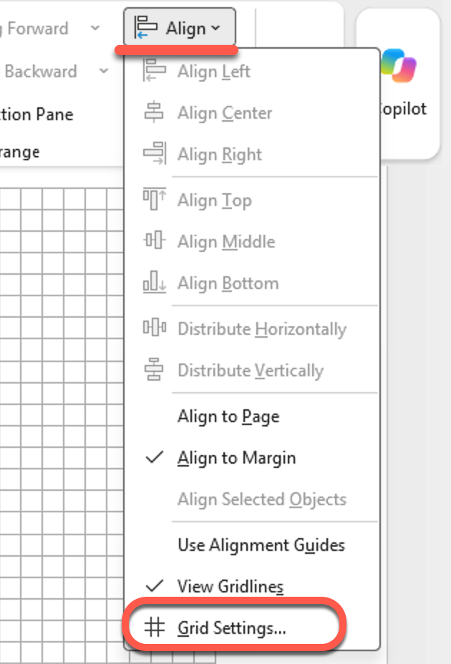
- Under Show grid, tick Display gridlines on screen.
- Clear the Vertical every box. That box is what adds vertical lines, and the number beside it sets how many grid intervals sit between visible lines.
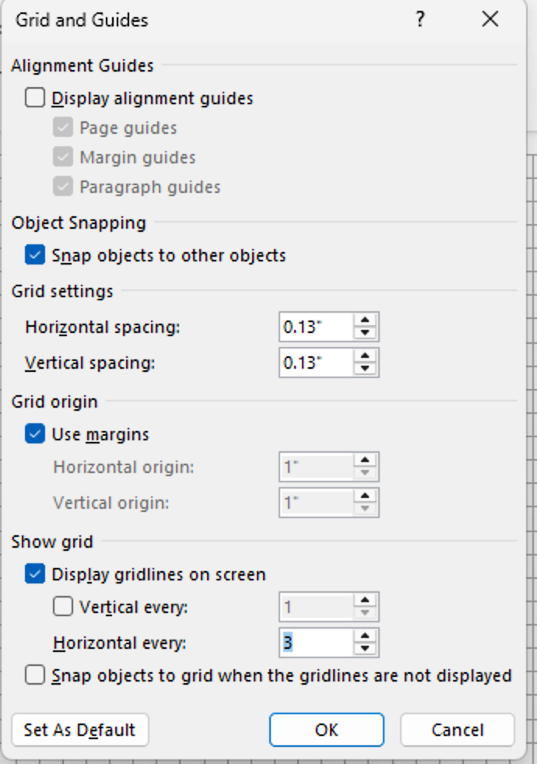
- Leave Horizontal every at 1 to see every line, or set it to 2 or 3 to see every second or third line.
Word for Mac
- Open the Word menu, choose Preferences, select Edit, then click Grid Options.
- Under Show grid, tick Display gridlines on screen and clear Vertical every.
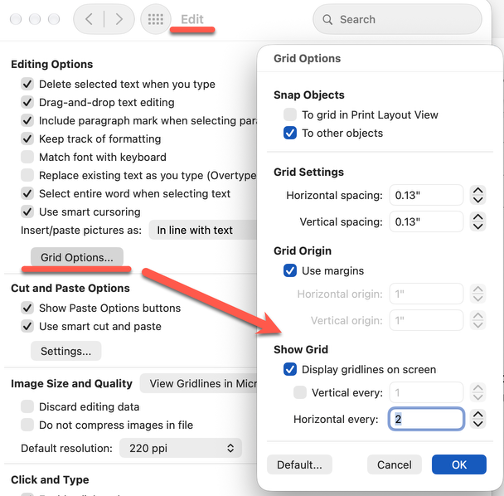
- After that, the Gridlines box on the View tab switches the grid on and off.
Setting the gap between lines
Vertical spacing sets the gap between the horizontal lines, not Horizontal spacing. The Horizontal every setting under Show grid works together with Vertical spacing under Grid settings. The name makes sense once you read it as “the vertical distance between lines.”
For a lined paper look, try these Vertical spacing values:
- 0.28″ is close to college ruled (9/32 inch)
- 0.34″ is close to wide ruled (11/32 inch)
Grid settings are saved with the current document. To use them in new documents too, click Set As Default and confirm.
Watch out for snapping. With the grid on, shapes and pictures may jump to the nearest line when you drag them. To place something freely, hold Alt while dragging on Windows. On a Mac, hold Command while dragging.
Changing the gridline color: you can’t
Word has no option to change the gridline color, on Windows or Mac. Only borders on tables, paragraphs, pages and text boxes can take a color. It’s an annoying design flaw.
It’s an odd gap. Excel lets you pick a gridline color per worksheet under File | Options | Advanced | Gridline color. Word never got an equivalent. Macros don’t help either, because Word’s grid settings only cover showing the grid and its spacing. Fancy gridlines to make Excel look great or at least different. shows how to change gridline colors per worksheet and apply colored borders to cells.
Try Rule Lines instead
Rule lines on the Draw tab (Windows only) are an alternative to gridlines. Choose Draw | Format Background, then pick Rule Lines or Grid Lines.
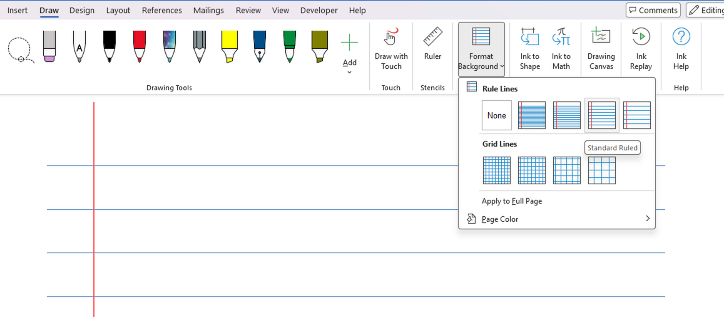
Rule lines are horizontal only, so this is the quickest lined page look. There are limits, though. These lines don’t print, and Word for Mac doesn’t support them. The Draw tab also isn’t in Word 2016; it only appears in newer versions such as Microsoft 365, 2021, and 2024.
Workarounds for colored or printable lines
If faint gray lines on screen aren’t enough, use one of these. These will print but both accept any color.
Paragraph borders. Press Enter 30 or so times, select those empty paragraphs, then go to Home | Borders | Borders and Shading. Pick a color and width, then click the bottom border and the “between paragraphs” border in the Preview. You get lined paper in your chosen color.
A table with horizontal borders only. Insert a one-column table with as many rows as you need. On Table Design, set the border color, then apply only Inside Horizontal and Bottom borders. Use Layout | Height to set an exact row height.
Don’t confuse it with table gridlines
Word has a second, separate gridlines feature for tables. It shows dashed lines around cells that have no borders. You turn it on or off with the View Gridlines button on the Table Layout tab. This setting is independent of the document grid controlled from the View tab.
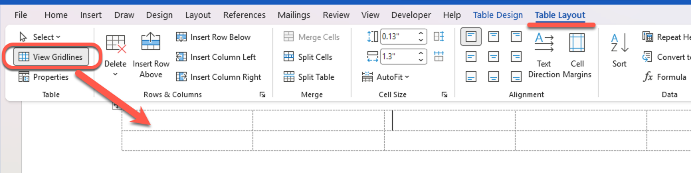
The same color rule applies: table gridlines are always gray. If you want colored lines in a table, apply real borders instead, but those appear in the printed document.
Why you might not need Word gridlines
Gridlines have been a Word feature for a long time but have been partly replaced with better ways to align objects with Alignment Guides or ‘Snap’ options.
Alignment Guides
Alignment Guides are only in Word for Windows and appear as green lines as you drag an image or object around the page. They show when the object is in line with the top of a paragraph or margin (horizontal) or left, center, right (vertical).
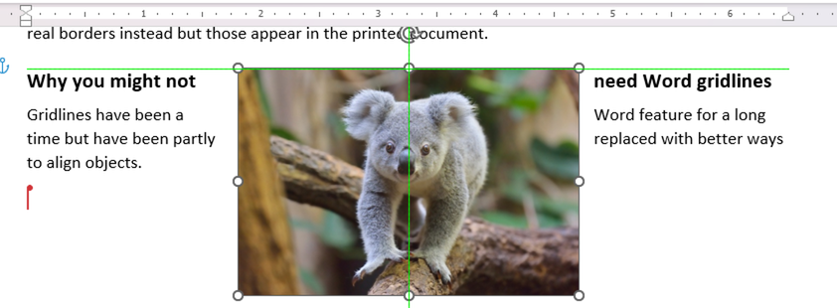
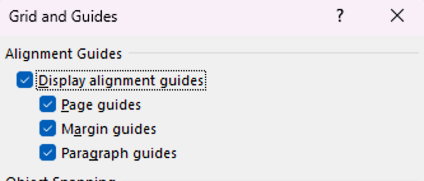
The page, margin, or paragraph guides are controlled at Align | Grid Settings | Alignment Guides.
Snap to Objects
On the same dialog (Align | Grid Settings) is “Snap objects to other objects”.
Snap objects to other objects is a positioning aid in Microsoft Word that makes it easier to line up pictures, shapes, text boxes and other graphical objects without manually adjusting their positions. It works a little like a magnetic attraction between objects. When you drag one object close to the edge or alignment point of another, Word automatically adjusts its position to make them line up.
Snap to grid
There’s also “Snap objects to grid when the gridlines are not displayed” (Align | Grid Settings) which moves objects toward intersections of an underlying page grid, even when it is invisible.
More Ways to Tame Word’s Layout and Gridlines
Word’s alignment tools go well beyond gridlines. Stop Fighting Word’s Image Placement: One Setting That Actually Works walks through the wrap text setting that finally keeps pictures where you put them, and Put a Picture Inside Another Picture in Office, Even at an Angle covers the Edit Points trick for fitting images into angled frames.
Tables are one of the workarounds mentioned above for printable lines, but they can do a lot more. Make a Word table with picture background explains how to layer an image behind table cells, and 3 Easy Ways to Overlay an X Over Text in Word and PowerPoint uses table borders in a creative way most people never consider.
Word’s page formatting has other surprises worth knowing. Three APA Formatting Traps in Microsoft Word That Ruin Academic Papers covers the default spacing and header traps that catch even experienced users, while Four more vertical formatting tricks in Word goes deeper into adding vertical lines and borders to a page.