Put a Picture Inside Another Picture in Office, Even at an Angle
Dragging one image on top of another almost never looks right. The moment the screen or frame in the background photo sits at an angle, the picture you drop on it looks pasted on. There is a better way built into Word, Excel and PowerPoint that takes about two minutes: draw a shape over the screen, reshape it with Edit Points so it matches the angle, then fill the shape with your picture. Here is how to do it, plus the step most guides leave out that stops the two images drifting apart later.
Three examples of “picture in a frame or screen”
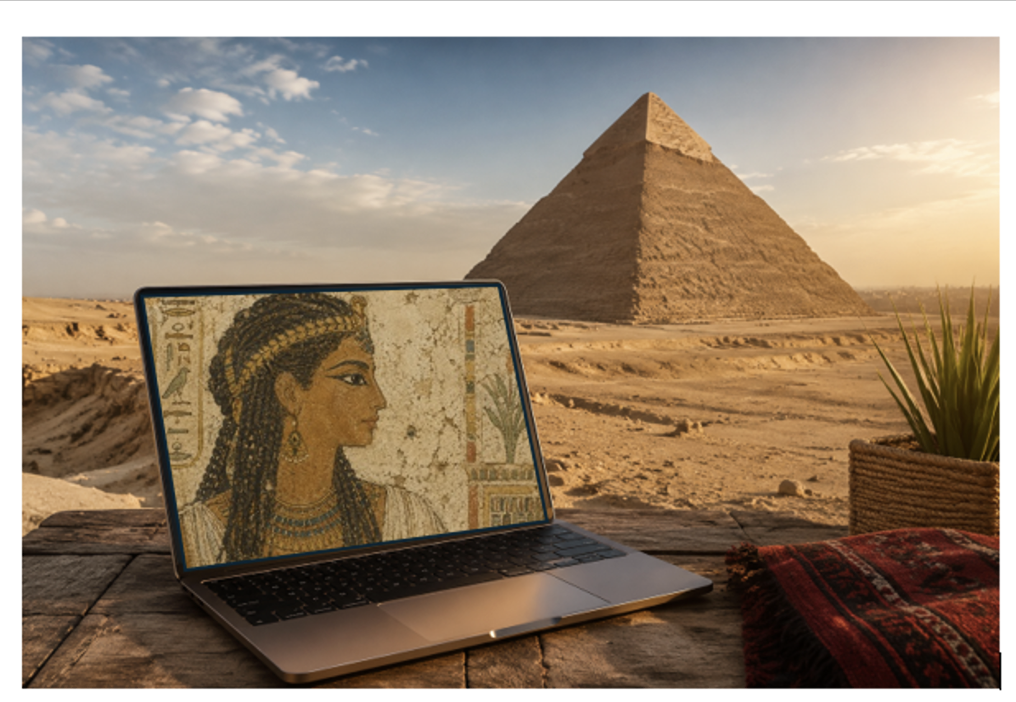
These days, the most common use is dropping an image into a laptop or computer screen.
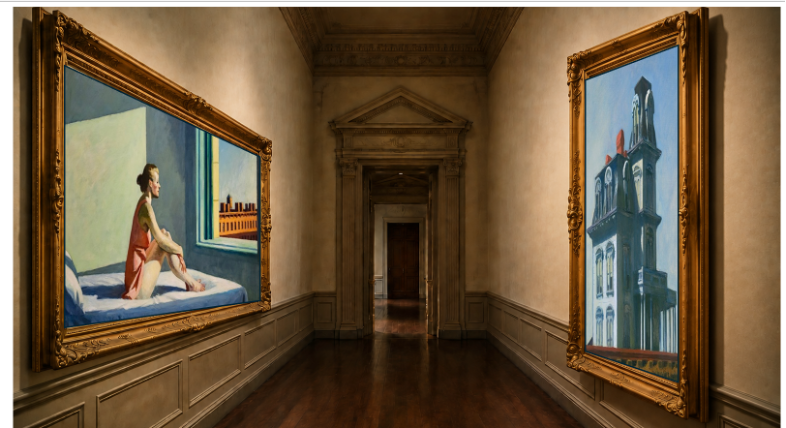
Or make an art gallery with your choice of paintings, Edward Hopper in this case.
Or a movie poster in an old-style movie theater.

In an organization, drop photos of team members or management into a gallery.
All modern Microsoft 365 or Office
This works in Word, Excel, and PowerPoint in Microsoft 365, or any modern Microsoft Office version (2024, 2021, or 2019). It works in the desktop apps for both Windows and Mac.
It’s part of the core image and shape features common across the Office apps.
Add an image on top of another image
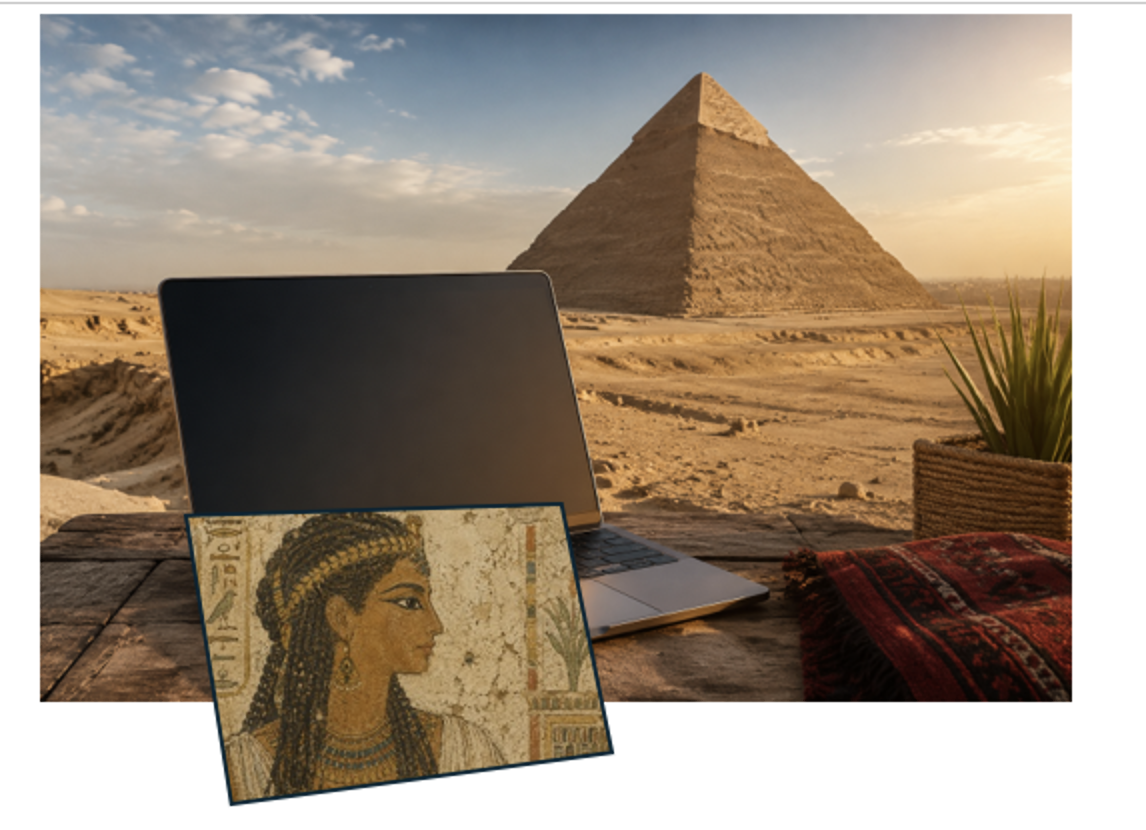
We want to put an image (right) onto the screen of the laptop (left).
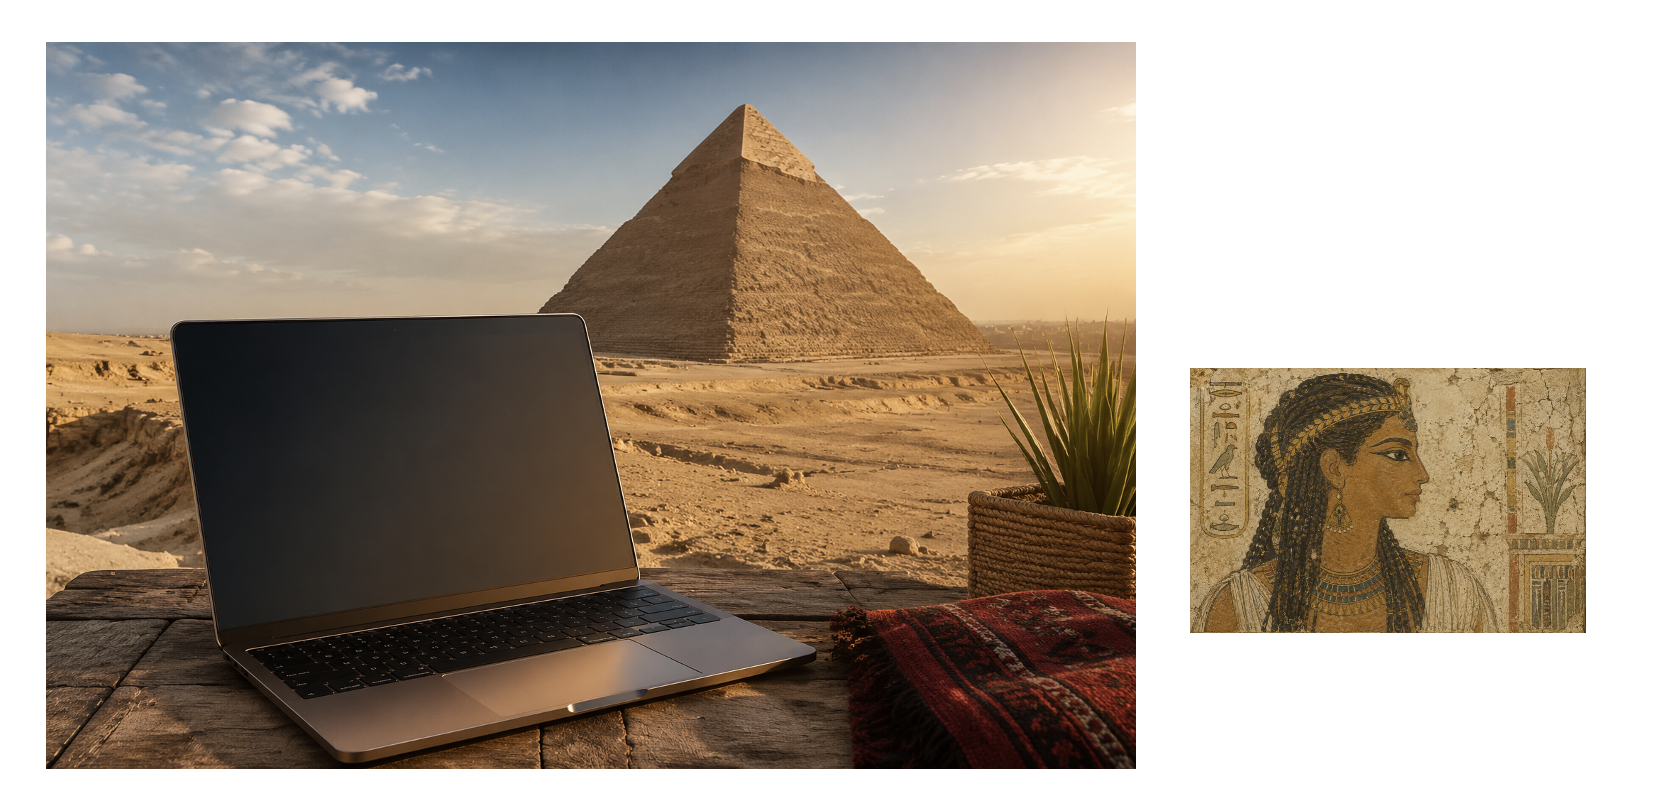
The simple way is to change the smaller image to Wrap Text | In Front of Text, then drag it over the larger picture. That is fine when the frame is a neat rectangle facing the viewer, and only then.
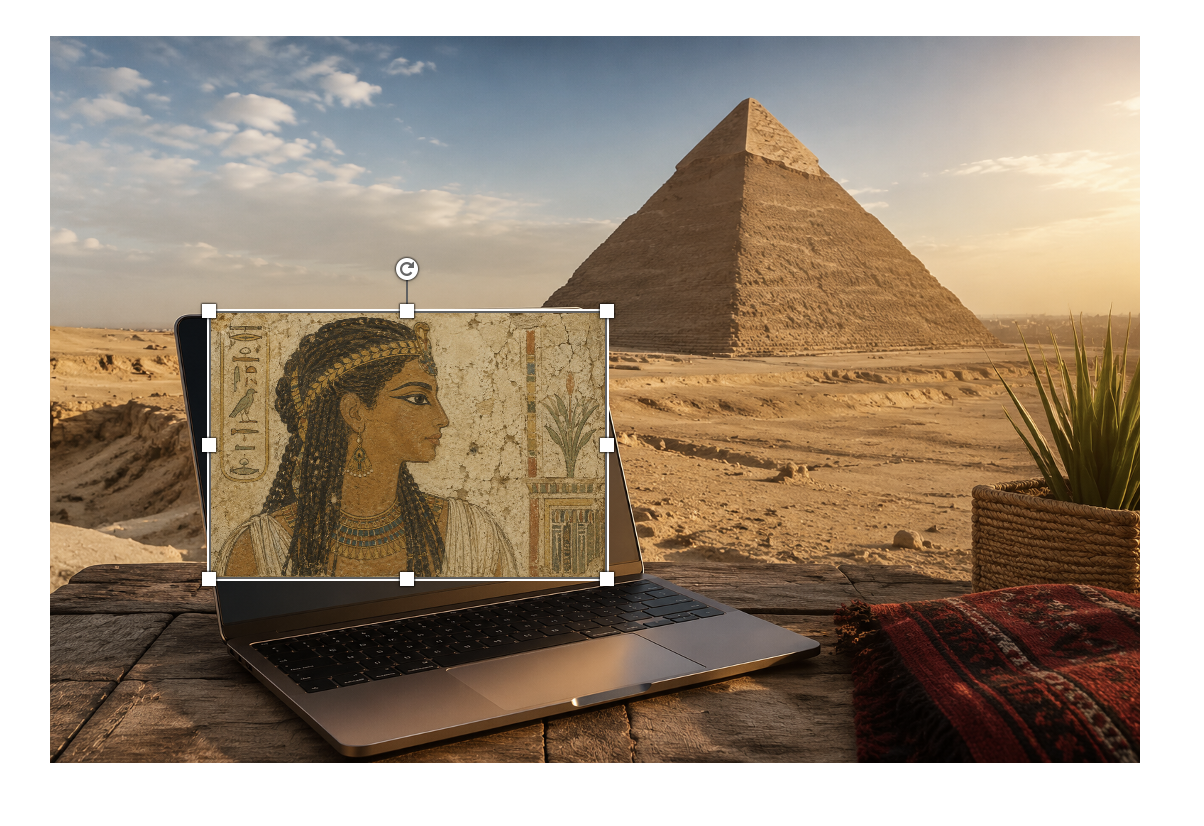
If the frame is at an angle, the result is not very good.
Insert into a virtual frame or screen
The trick is to add a shape over the frame or laptop screen, adjust the shape so it covers the screen area, and then put the image into that shape.
Add a rectangle
First add a shape, in this case a rectangle from Insert | Shapes | Rectangles.
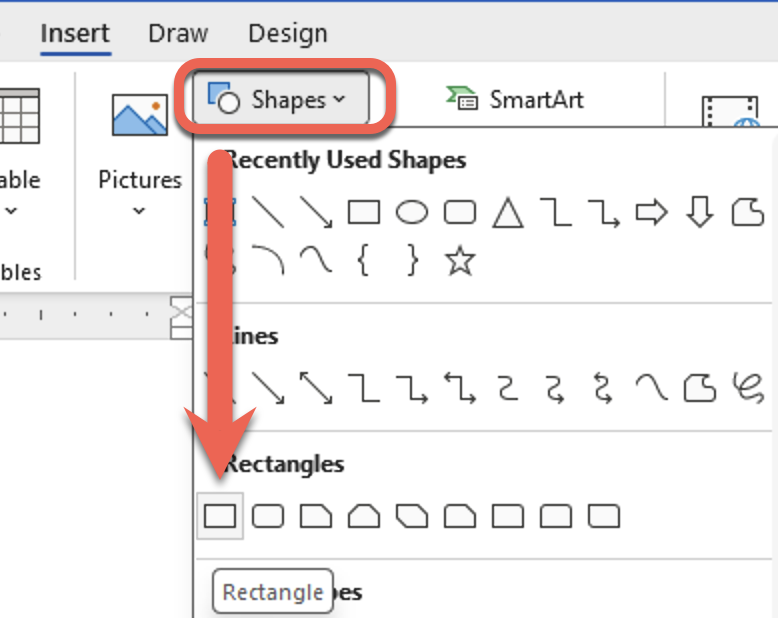
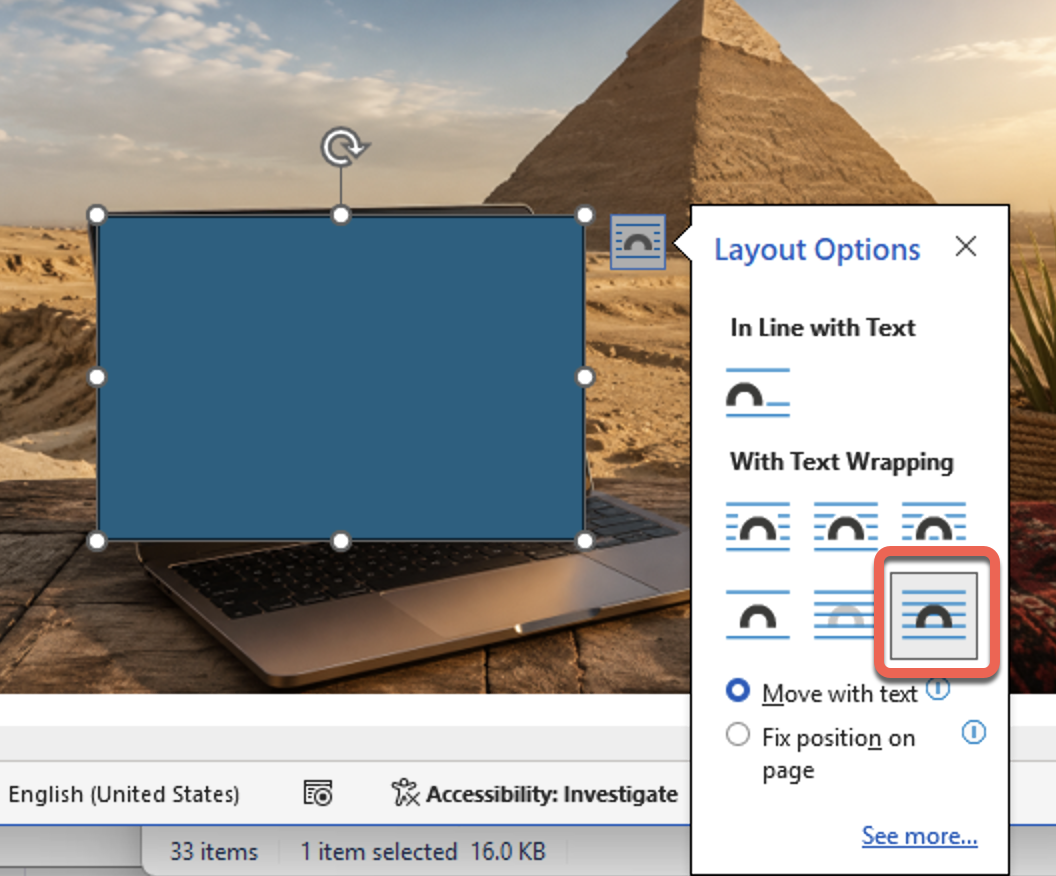
Position the rectangle roughly where you need it to be. If necessary, change the text wrapping to “In Front of Text,” which really means “in front of the text layer,” where the main image lies.
Edit Points
Now for the bit that makes all the difference: on the Shape Format tab, go to Insert Shapes | Edit Shape | Edit Points or right-click on the shape and choose “Edit Points” from the menu.
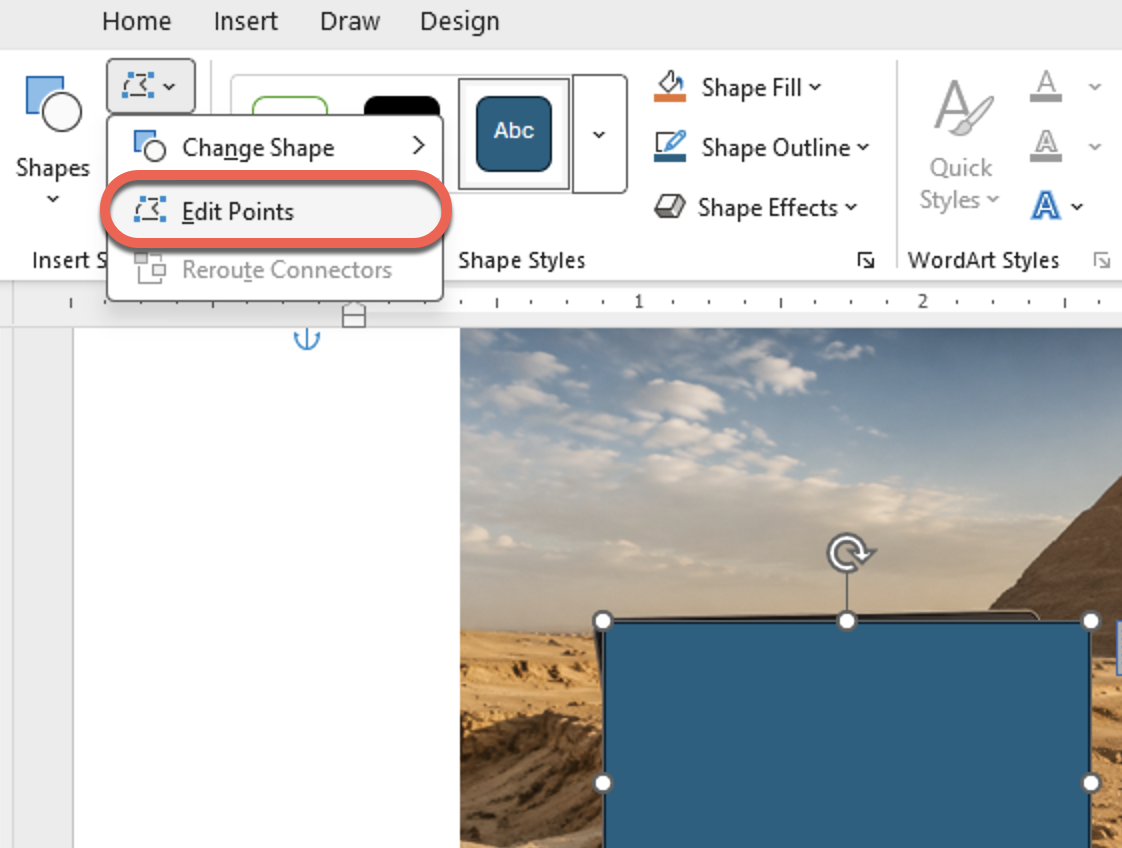
Edit Points lets you ‘skew’ the shape by dragging the corners or sides around. The results can look weird at first.
Tip: hold Shift while dragging for straighter results, and drag from a corner first
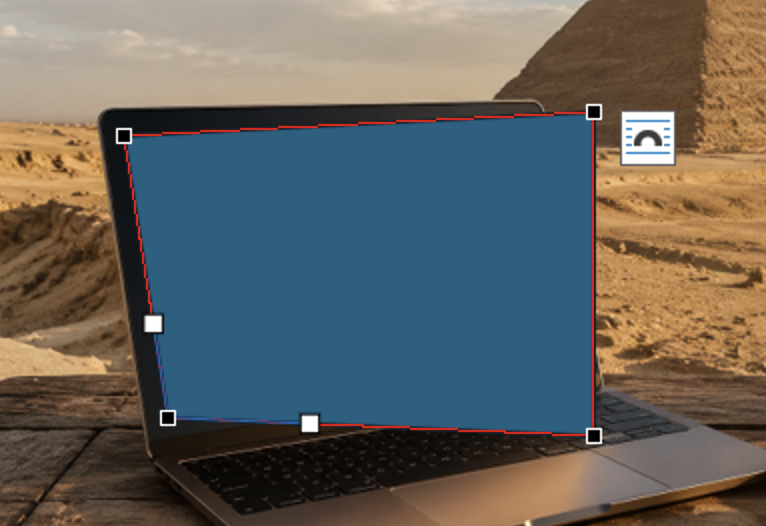
Move the corner handles around until they fit the frame or screen.
Tip: Zoom in for a closer look at the edges and corners.
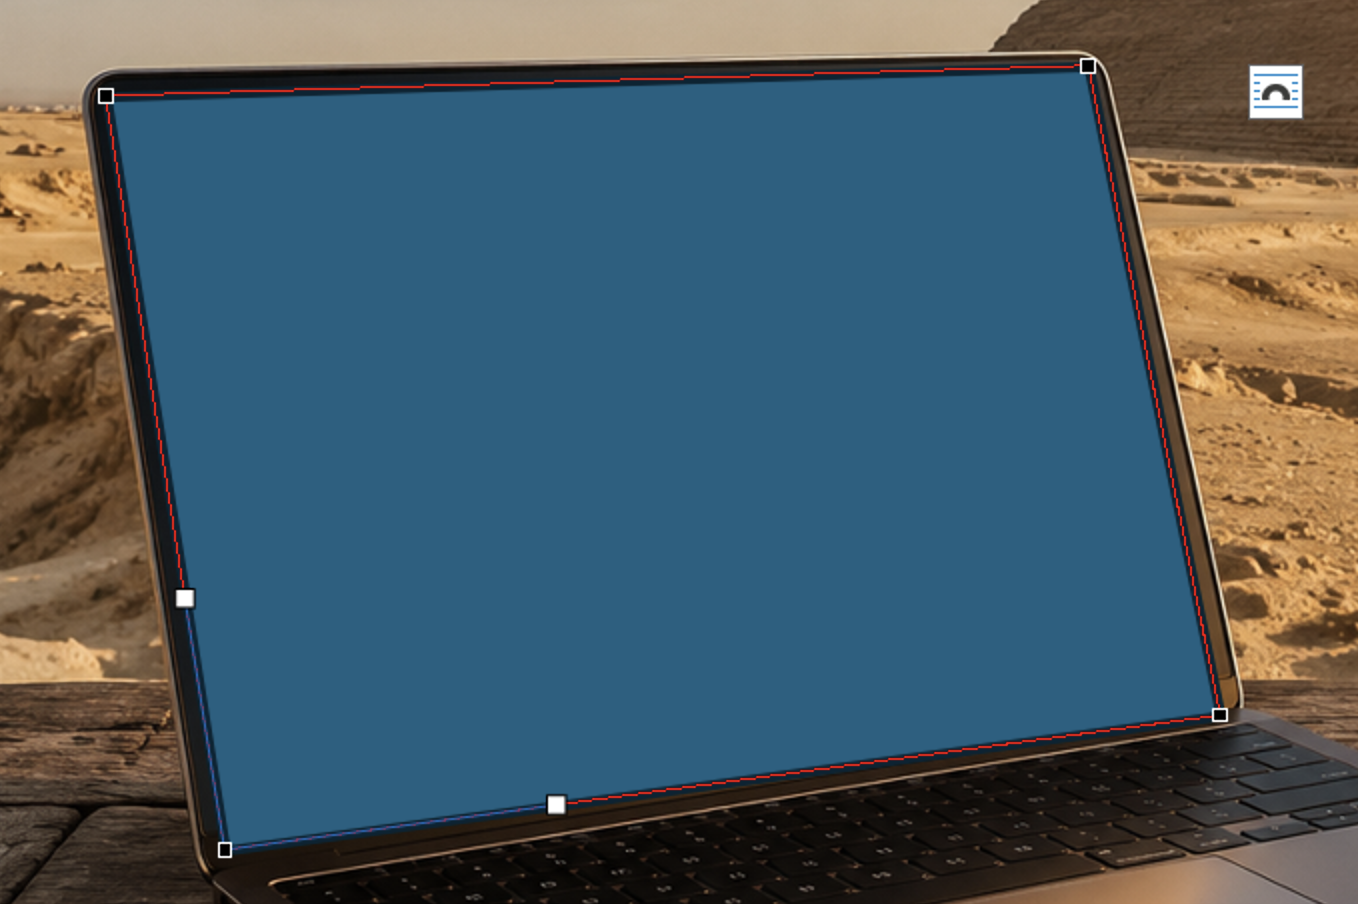
Add the picture
Finally, add the image from Shape Format | Shape Fill | Picture.
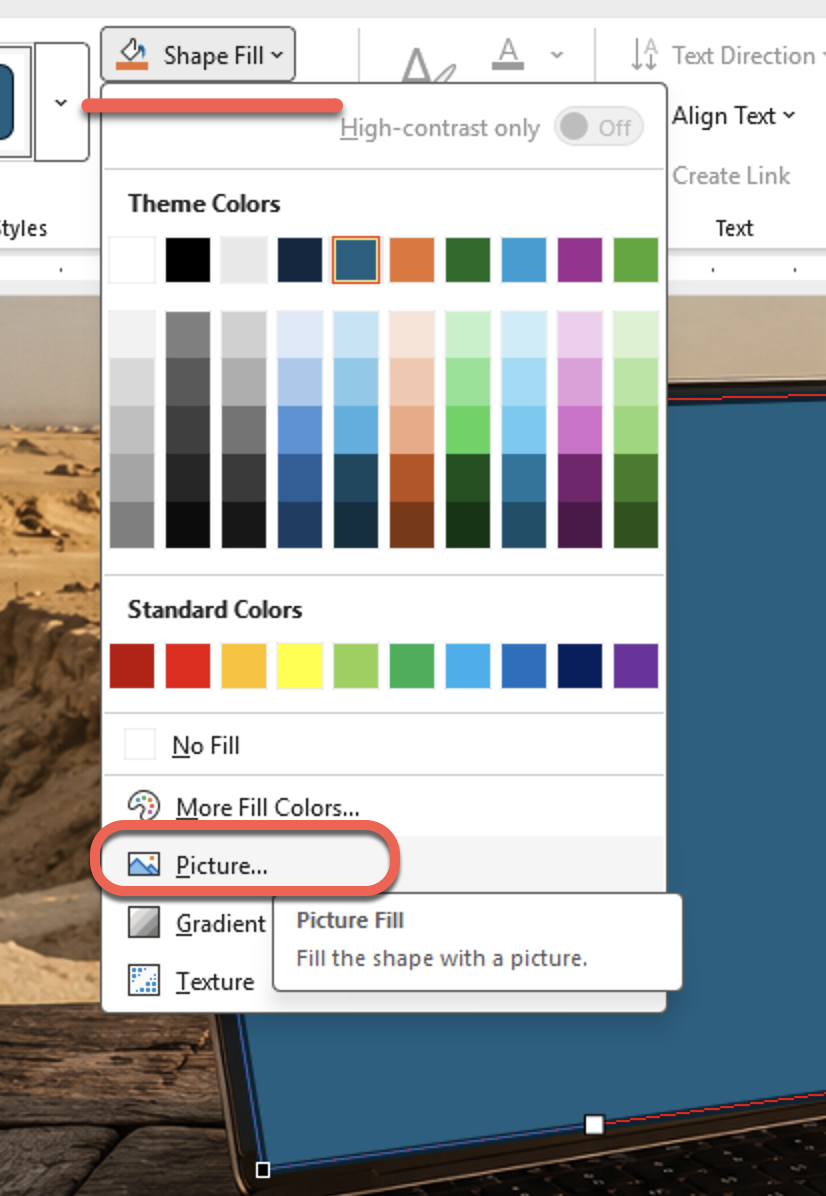
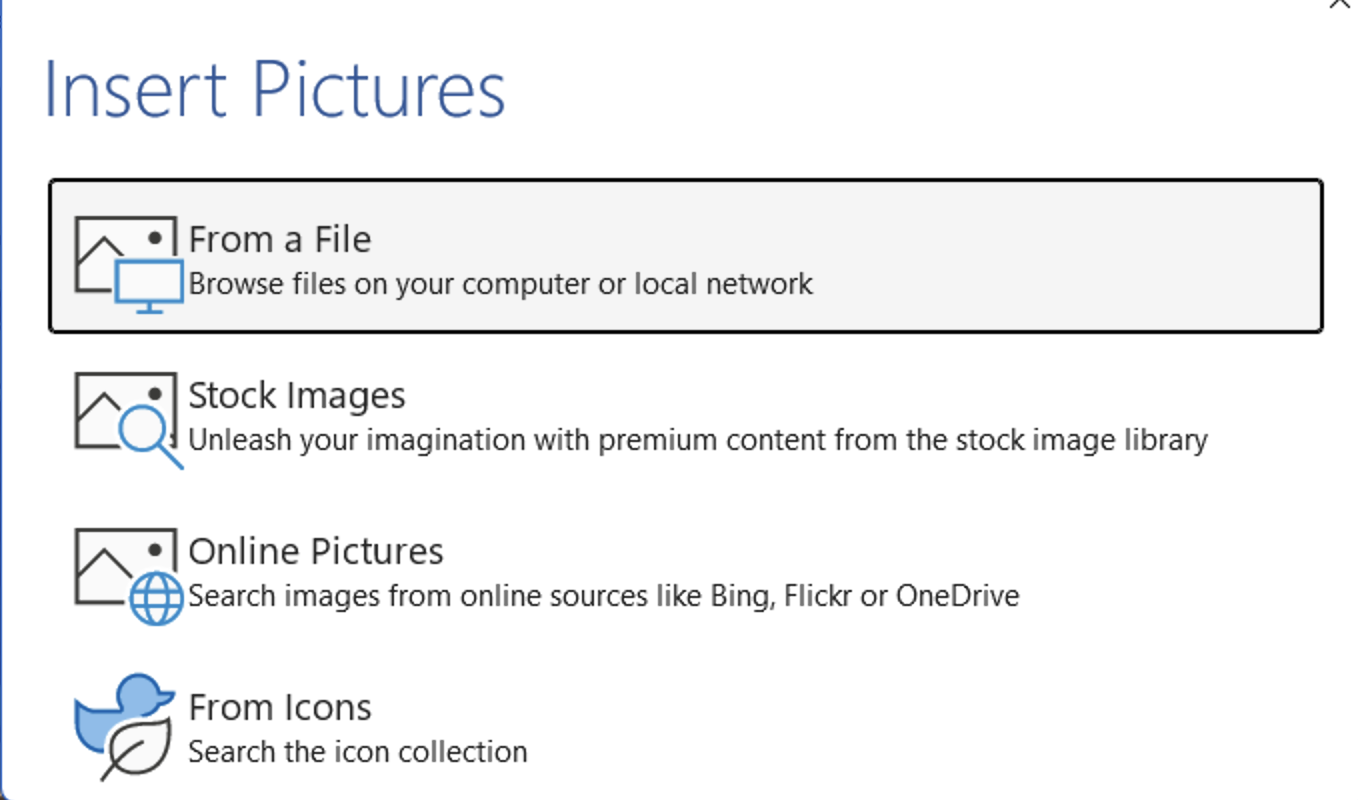
Alas, there’s no ‘From Clipboard’ option here, but all the usual suspects are available (File, Stock or Online images) plus Icons.
If the image has roughly the same proportions as the shape, Office will fit the picture into the shape area nicely. If necessary, all the usual picture editing features are available in the Format Picture pane such as Picture Format | Crop | Fill or Fit.
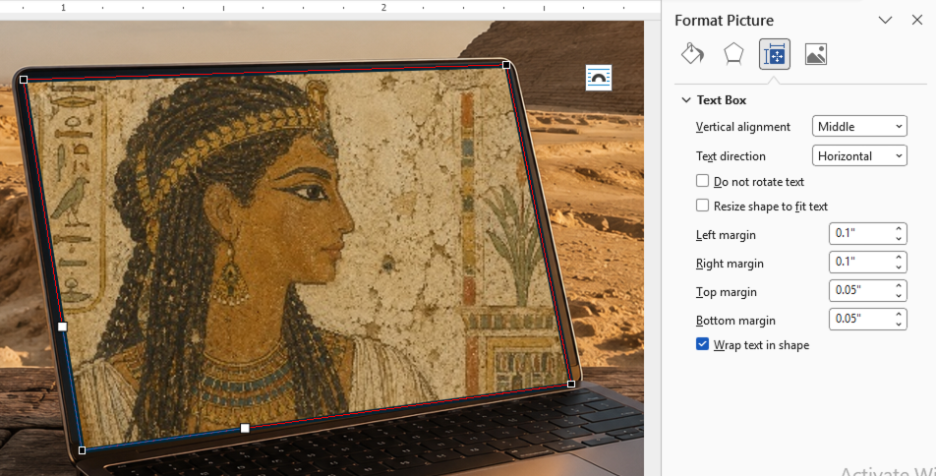
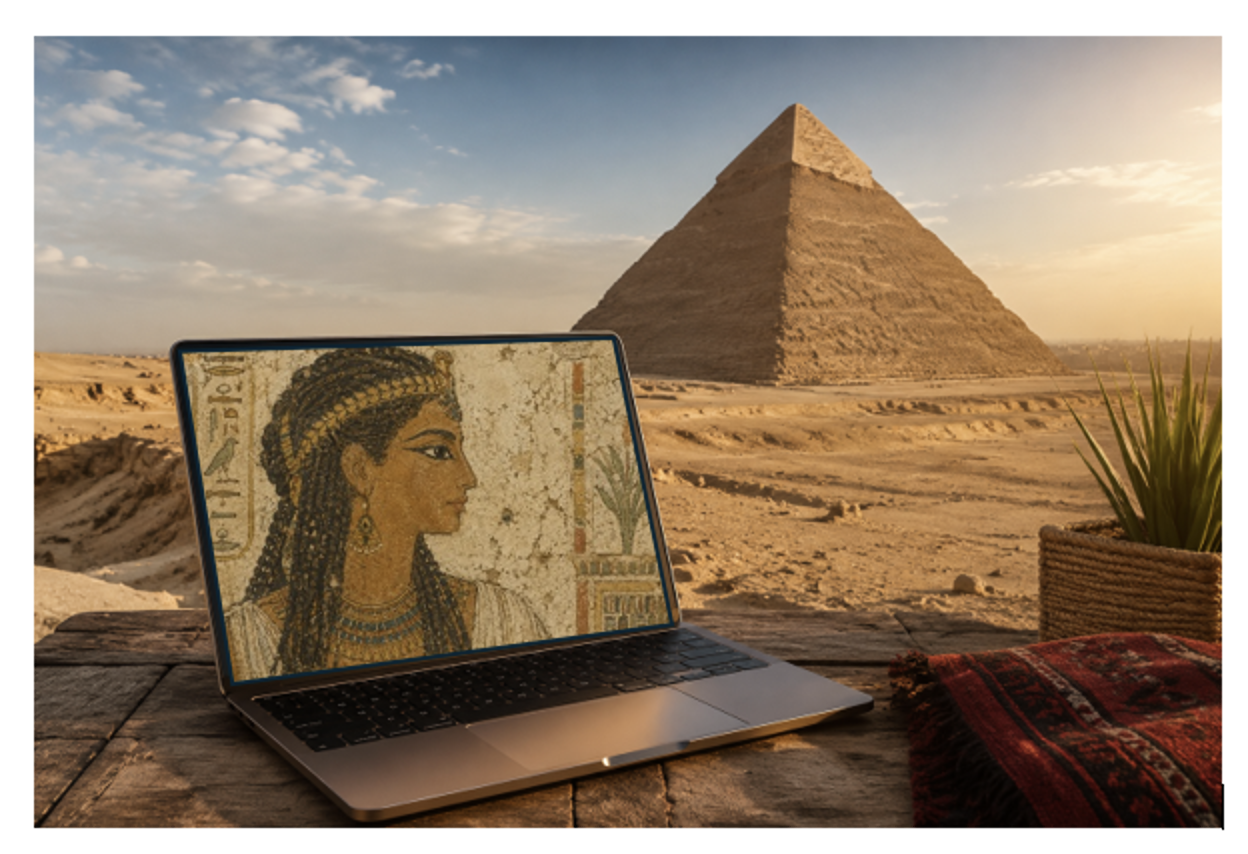
The finished product
And there you have it, a picture within a picture.
But wait, there’s more …
Most help ends there, but at Office Watch we like to add the extra essentials.
The two images are not linked in any way. Each is anchored to the page or paragraph, not to the other. It’s all too easy for the two images to lose their place like this.
There are two ways to link images or shapes so they move as one unit: the official method, or the quick and easy one.
Group objects
The official method is to group the objects together. That tells Office to treat the grouped items as a single entity.
Start by opening the Selection Pane, then select all the objects you want to group. Finally, go to Arrange | Group.
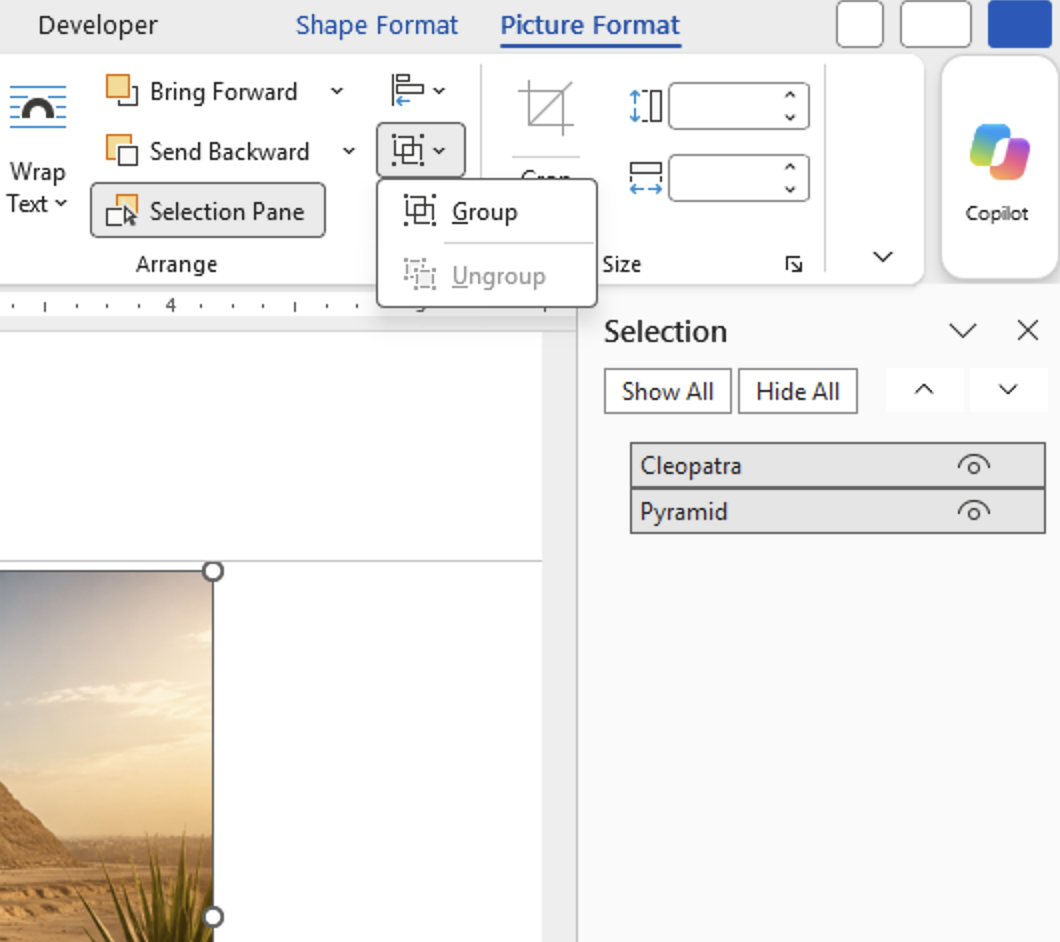
All grouped objects must have a Text Wrapping setting, not the default “In Line with Text”. If you can’t access the Group feature, that’s the most likely reason.
Grouped together, the two images will stay together as the document, sheet or slide changes around them.
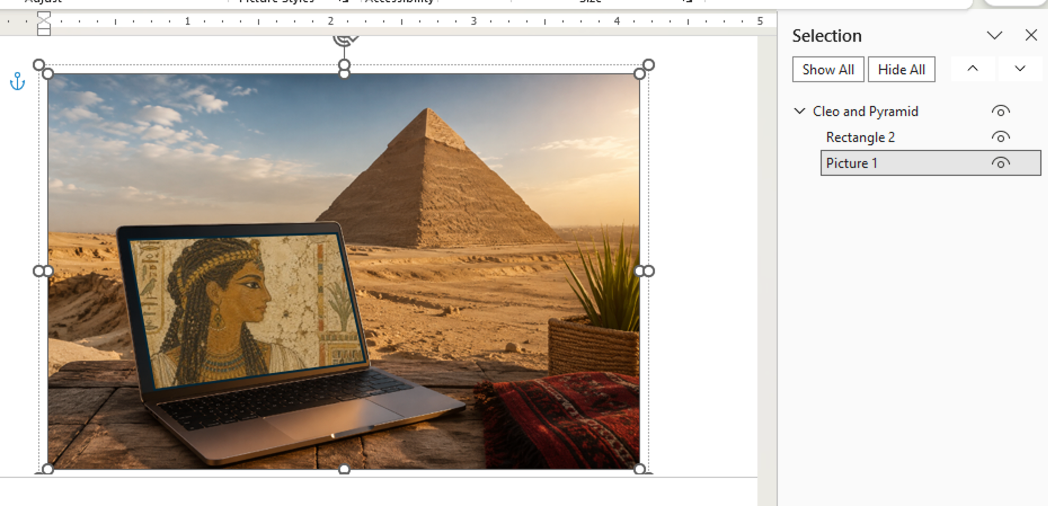
Tip: rename the objects or group in the Selection Pane from the bland Office defaults (for example, Picture 1, Rectangle 2, or Group 1). That will make them easier to understand later, especially on a crowded page, sheet, or slide.
Screenshot
The faster and often more reliable option is to take a screenshot of the finished, combined image and paste that in.
That’s a lot less complicated, especially in a shared document with other people involved.
Keep a copy of the document with the grouped images, in case you need to change it later.
More Office image tricks worth knowing
The shape fill method here is one of several ways to get a photo into a shape. If you want the picture cropped to a circle, arrow or icon instead of a screen, Three ways to crop a picture with an Office shape covers all the options and explains when each one is worth the trouble. For total control over exactly which part of the photo shows through, Make a transparent shape to mask a photo in Word, PowerPoint and more takes more steps but lets you move the shape and the picture independently.
When the picture does not sit in the shape the way you expected, the fix is usually Fill or Fit, and Office Picture formatting tricks: Fit, Fill and Positioning shows how to grab the right set of handles so you can nudge the image inside the frame instead of resizing the whole thing.
Keeping objects where you put them
Grouping is the step most people skip until their layout falls apart. Group and Ungroup objects in Word, PowerPoint and Office explains why the Group button is sometimes greyed out and how to get it back, while See more with Selection Pane in Excel, PowerPoint and Word is the tool that makes selecting a shape hidden underneath a photo possible at all.
If you have ever wondered why an image jumps to the next page on its own, Layers in Word: How to Control Text, Images, and Layout Like a Pro explains what is actually going on beneath the text, and Stop Fighting Word’s Image Placement: One Setting That Actually Works has the single settings change that saves the most time.
Getting the source images right first
A cleaner starting image makes the finished picture in picture look far better. Two better ways to Remove Background from images shows faster and free alternatives to Office’s own background tool, and Framing pictures, graphics, logos in Word and PowerPoint covers the border and edge options that make a mounted photo look deliberate rather than dropped in.
One warning once you start layering photos: file sizes climb quickly. Smaller images make smaller documents in Word and Office explains why cropping does not shrink anything and what actually does.