Let’s go deeper into the Microsoft Word ‘Find’ function, looking specifically at a number of options that can be accessed in the Word “Find” feature (Ctrl+F) and clicking its “More” button.
In a recent issue of Office for Mere Mortals we looked at how to search within a Word document. There is a lot of hidden power accompanying the relatively simple process of finding text within a document.
Advanced Find
The clever Find features are in Advanced Find. Press Ctrl + F to open the Word navigation pane, click on the pull-down menu then Advanced Find …
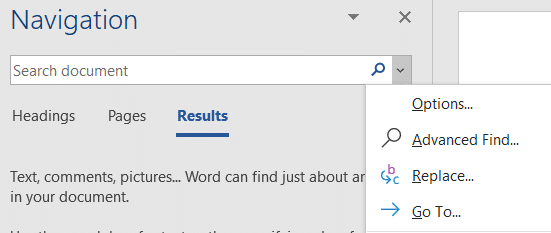
It’s called Advanced Find but many long-time Word users will know it as the standard Find dialog that’s been in Word for many, many years.
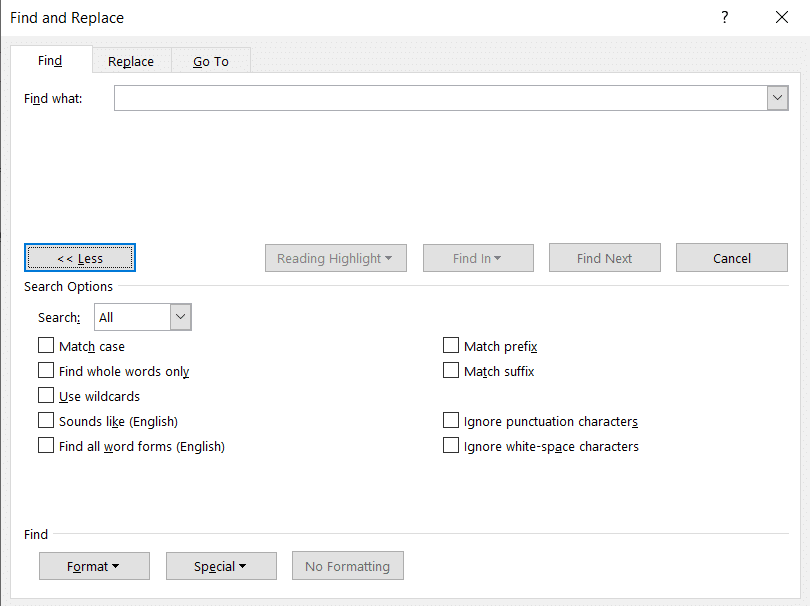
Click on the More … button to see a lot of power in Word’s Find.
FIND WHOLE WORDS ONLY
‘Find whole words only’ is a selectable option in Word that can be accessed in the Find feature (Ctrl-F) by clicking the ‘More’ button to display more specific search features.
But what does it mean to find whole words only? Isn’t that what a normal search is meant to do? Well… yes and no. A ‘whole word’ is defined in Office as a group of characters surrounded on either side by one or more spaces or punctuation marks.
To demonstrate the difference between having the ‘Find whole words only’ option selected and not having it selected, I will use a very simple example. Feel free to try it for yourself in Microsoft Word.
Let’s pretend that you are searching for the word ‘ample’ out of the following short text: “This sample sentence is one way to demonstrate the ample finding flexibility of Office”.
There is only one instance of the word ‘ample’ within the text, searching without the ‘Find whole words only’ option would actually find 2 matches. The less obvious match comes as part of the tail-end of the second word of the text, which is ‘sample’.
To further demonstrate my point, the word ‘in’ does not appear within the sample sentence on its own using ‘Find whole words’, but would be found twice within the word “finding” with that choice off.
By selecting the ‘Find whole words only’ option, Office will omit matches to any search query that is found _within_ a word of the document. Such a search is less intensive for the program and will therefore be faster with large amounts of text.
Before you go setting this option, be forewarned that it will omit any plurals from your search results. Searching for the word ‘sport’ in the following text will not produce any matches: “Why are all the sports I want to watch on at the same time?”
USE WILDCARDS
A wildcard is a special character that you can use to represent one or more characters in a search string. Any character or set of characters can be represented by a wildcard character. It is really just another name for a “regular expression”.
With just a few special characters and the knowledge of what they represent, searching for strings that conform to a predefined grammar (or pattern) now becomes extremely easy.
The first step to using wildcards in your search terms is to select the ‘Use Wildcards’ option, which can be found in find dialog box after clicking the ‘More’ button. The ‘Match case’ and ‘Find whole words only’ check boxes are now unavailable (grayed out).
There are two ways to incorporate wildcards into your search query string. The first is to choose the particular wildcard character from a list. To do this, click the ‘Special’ pull-down menu and select the desired wildcard character from the resulting list. Then type any additional text into the ‘Find what’ box. The second way is to simply type in the wildcard character directly into the ‘Find what’ box!
The asterisk (*) is the most commonly used wildcard to search for a string of one or more characters. For example, just say you want to find all words that start with “a” and end with “m”. Then you could write “a*m” as your search term. Your results could be anything from “aim” to “antidisestablishmentarianism”.
The next most commonly used wildcard is the question mark (?), which can be used to substitute for any single character. For example, sat?n finds “satin” and “satan”.
SOUNDS LIKE… FO-NE-TIKS
The ‘Sounds like’ option is a type of search mechanism for words that may have been spelt phonetically. To make this point, searching for the word ‘phonetically’ with the ‘Sounds like’ option switched on, will find all of the words that would sound like the word ‘phonetically’ if you were to say them out aloud. As a test, I wrote down ‘fonetikalee’ in a document and searched for the word ‘phonetically’ with the ‘Sounds like’ option activated. The find feature was indeed able to determine that I was searching for the word ‘fonetikalee’.
This function may be of use for people who type up conversations between people in real-time. If someone uses a word you are not familiar with in such a situation, you don’t really have the time find out how to spell it properly. In such a situation, the common solution would be to simply type it phonetically (as it sounds) and then move on. Sometime after scribing the conversation, you may have a flash of enlightenment and realize what word the person actually said.
Instead of scrolling through pages of text to find it and change the potentially numerous incarnations of phonetic spelling, you can simply type in the correct word to the search facility with the ‘Sounds like’ option selected, and hope that your phonetic spelling was sufficient for the ‘Sounds like’ search algorithms to pick up.
FIND ALL WORD FORMS – PAST, PRESENT AND FUTURE TENSE
The ‘Find all word forms’ option has a simple, but powerful function. It acts by finding all possible tenses of the search word.
For example, if I searched for “run”, then both “run” and “ran” could be potential search results.
Similarly, searching for “talk” could have both “talk” and “talked” as potential search results.
Searching for “laugh” on the other hand, could have “laugh”, “laughed” and “laughing” as potential search results.
READER QUESTION: HOW DO YOU FIND A SPACE?
A question from an OfMM reader recently queried us how to find a space within a document. This is quite simply a case of typing a space into the ‘Find what’ text box and clicking the ‘Find Next’ button. This will find each and every space from the start to the end of the document. A useful application of this would be to insert two spaces in the “Find what” box in order to any occurrences of two consecutive spaces within a document, in order to ensure consistency of spacing between sentences.
Selecting the ‘Special’ pull-down list in the Find dialog box will bring up a list of special search character types. The last option on this list is called ‘White-space’ and as the name suggests, can be used to find groups of white space within the search area.

This is equivalent to typing /w into the ‘Find what’ text box.
THE ‘GO TO’ TAB
Another way of quickly accessing a certain area of a document, or even jumping through a document in regular increments, is to use the ‘Go To’ tab on the Find dialog box.
On this tab you can select between a number of document elements including: page, section, line, bookmark, comment, footnote, endnote, field, table, graphic, equation, object, and heading.
Then simply jump through the document For example, if the page option has been selected, you can type in the page you wish to ‘Go To’ in the ‘Enter page number’ text box. Then click the ‘Next’ button and you will be taken there.

An interesting function is to go to the heading in the document. If you have headings few and far between, then this is a useful tool. You have to make sure that your headings are formatted as a “Heading” within word, and aren’t simply bolded or formatted “Normal” text.
Shortcuts for Word heading styles
Advanced Find using Wildcards
The Replace function in Office – Part 2
The Replace function in Office – Part 1
The Find function in Office – Part 1