How to run administration commands via PowerShell for Microsoft 365 hosting and especially Microsoft 365 Exchange Server or mailbox hosting.
Microsoft 365 customers will often see instructions like this to configure their Exchange Server mailboxes using PowerShell.
Set-OrganizationConfig -AllowPlusAddressInRecipients $true
Looks simple, but that command alone won’t work in PowerShell because there are add-ins to be installed and login necessary.
That command enables Plus Addressing in Exchange Server. It’s typical of an option only available via PowerShell, not the admin web page.
PowerShell also let administrators control multiple mailboxes more easily. PowerShell is a formidable tool but hardly user friendly.
Unfortunately, Microsoft seems to assume all their customers are born knowing the intricacies of PowerShell and how it works with Microsoft 365. Redmond seems happy to publish long complicated command lines without any context. It’s especially hard for small self-managing organizations.
Setting up Exchange Server access isn’t simple and made worse with truly awful error messages. The warnings and errors are so unhelpful they would have been considered inadequate in the 1990’s, let alone now.
Here’s how to setup PowerShell ‘from scratch’ so you can administer Microsoft 365 hosted mailboxes.
For this article, we’ll show how to setup admin access to a Microsoft 365 hosted Exchange Server organization. It applies to most Microsoft 365 hosting worldwide but there are special cases with slightly different commands or 21Vianet (China), Office 365 Germany plus US Government DoD and GCC High.
Before you start
You’ll need two things to start.
PowerShell – we’ll use PowerShell that comes with all Windows 11/10 64-bit systems. PowerShell 5.1 to 6 only. If you have the latest Windows release, you’ll have Powershell.
Admin access – email address, password and, if necessary, Multi-factor authentication for administrators access to the Microsoft 365 organization.
Start PowerShell
Open up PowerShell from the Start Menu. It needs ‘Run as Administrator’ access to install some modules.

Just like the Command Prompt (DOS Box), PowerShell lets you recall commands using the Up / Down arrow keys. Edit a command by up arrow to recall it, then retype as required. Copy/Paste works to enter commands.
See “Allow script access aka Execution Policy” below if you strike a script access error while following these steps.
Install ExchangeOnline module
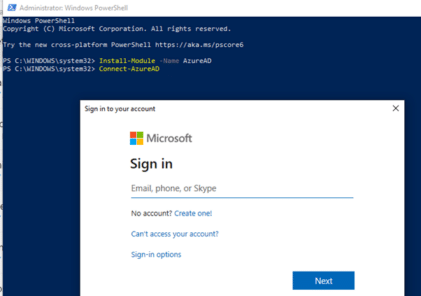
If you connect OK, the account is listed like this …

Install Exchange Server
Now install the Exchange Server module to manage Microsoft 365 managed mailboxes.
Install-Module -Name ExchangeOnlineManagement -RequiredVersion 2.05
If there’s no error message, the module has installed OK.
If you get an error : The specified module ‘ExchangeOnlineManagement’ was not loaded because no valid module file was found in any module directory.”

See the ‘Allow script access’ section below .
Now connect to Exchange Server. This is the official syntax.
Connect-ExchangeOnline -UserPrincipalName <UPN> -ShowProgress $true
<UPN> means User Principal Name or as anyone else would say administrators ‘email address’ like this:
Connect-ExchangeOnline -UserPrincipalName fred@fredagg.com -ShowProgress $true

There will be Microsoft account login required.
Wait while various modules are loaded and connected.
Now you can control ExchangeServer from PowerShell.
A simple command to test if it’s working is: Get-Mailbox
That shows the basic details of the current mailbox account.
Later, on the same machine ….
Once you’ve installed the ExchangeOnline module, it applies to any future PowerShell sessions on that computer.
If you open PowerShell later on the same machine, all you have to do is login to ExchangeOnline.
Make sure Execution Policy is set to RemoteSigned or Unrestricted.
Use the same login command as above:
Connect-ExchangeOnline -UserPrincipalName admin@whatever.domain -ShowProgress $true
Login as prompted and you’re good to go!
For regular use, we save these two lines separately then paste both into PowerShell.
Set-ExecutionPolicy -ExecutionPolicy RemoteSigned
Connect-ExchangeOnline -UserPrincipalName admin@mydomain.whatever -ShowProgress $true
Or use Up arrow to recall them from earlier sessions.
Allow script access aka Execution Policy
You might strike script errors due to PowerShell’s security policy which limits script execution.
If you get that error, change the ExecutionPolicy for PowerShell on that computer. There are different policies depending on the scope, but for our needs just focus on the LocalMachine scope (the default scope).
There are various policy levels, for our purposes there are two possibilities: RemoteSigned and Unrestricted.
Use this command to allow external scripts that are digitally signed.
Set-ExecutionPolicy -ExecutionPolicy RemoteSigned

Failing that use this:
Set-ExecutionPolicy -ExecutionPolicy Unrestricted
It allows unsigned scripts and is a potential security risk. Only use if you’re sure the script is OK. This is the default for PowerShell on non-Windows computers.
To see the current ExecutionPolicy use the command
Get-ExecutionPolicy
Or
Get-ExecutionPolicy -List
This shows the ExecutionPolicy for all scopes, including LocalMachine

There’s a lot more to Execution Policy. See About Execution Policy and Set-ExecutionPolicy
Just the beginning
We’ve skipped over a LOT about Azure, ExchangeServer and PowerShell. It should be enough to let you use simple configuration commands like Plus Addressing.
Our aim was a simple guide to administrative access for options not possible in the admin web pages. Well … as simple as it’s possible with Microsoft’s intricate PowerShell system.
How to get ‘Plus’ email addresses, the new feature in Microsoft 365 and Outlook.com
Protect against the latest ransomware attack via Excel