How to put text around an object; image, chart, shape or other Microsoft Word object.
Continuing from our look at putting Word text vertically, at an angle or curved
Text around a Box
Putting text around a box requires four separate text boxes, positioned and grouped around the object.
Here’s a chart with four text boxes around it.
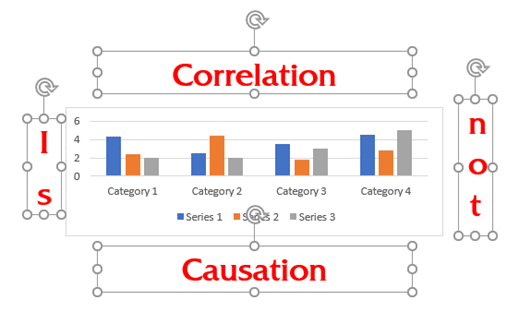
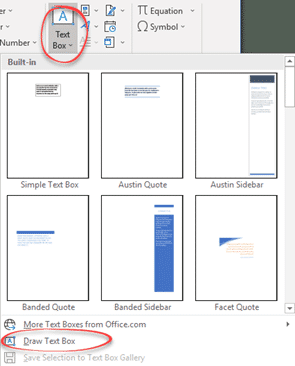
Use the Insert | Text Box | Draw Text Box option to roughly place the four boxes around the object. Then drag each box to its exact position.
Smart users will make just two boxes (top and left), position and format them then copy those two for the matching bottom and right boxes.
Tip: group the four text boxes together in the selection pane to make management easier. If you’ll be editing the document regularly, rename the objects to clearer names then just ‘Text Box …’ etc.

Text around a Circle
For a circular object, make a curved text box with a ‘No Fill’ or transparent background.

‘No Fill’ transparency will let you place the text box over the object without hiding the object underneath.

As you can see, the text curve doesn’t exactly match the smiley face curve. You can try adjusting the curve but you might find that Word doesn’t have enough fine control to get the exact effect you’d like.

How to set text on its side, an angle or a curve in Word
Two ways to add Gradient or Rainbow text or background effects in Word
See more with Selection Pane in Excel, PowerPoint and Word