To prevent somebody ripping off your prized presentation or deck, you should password-protect your presentation, making it accessible only to people you trust. PowerPoint includes a built‑in password‑protection feature that ensures only authorized users can open and modify your presentation.
Why password lock a PowerPoint presentation? To keep the deck safe from prying eyes either inside or outside an organization.
It’s also a way to keep a deck secure when saved or sent in an insecure way like a USB memory stick or email.
Protect Presentation
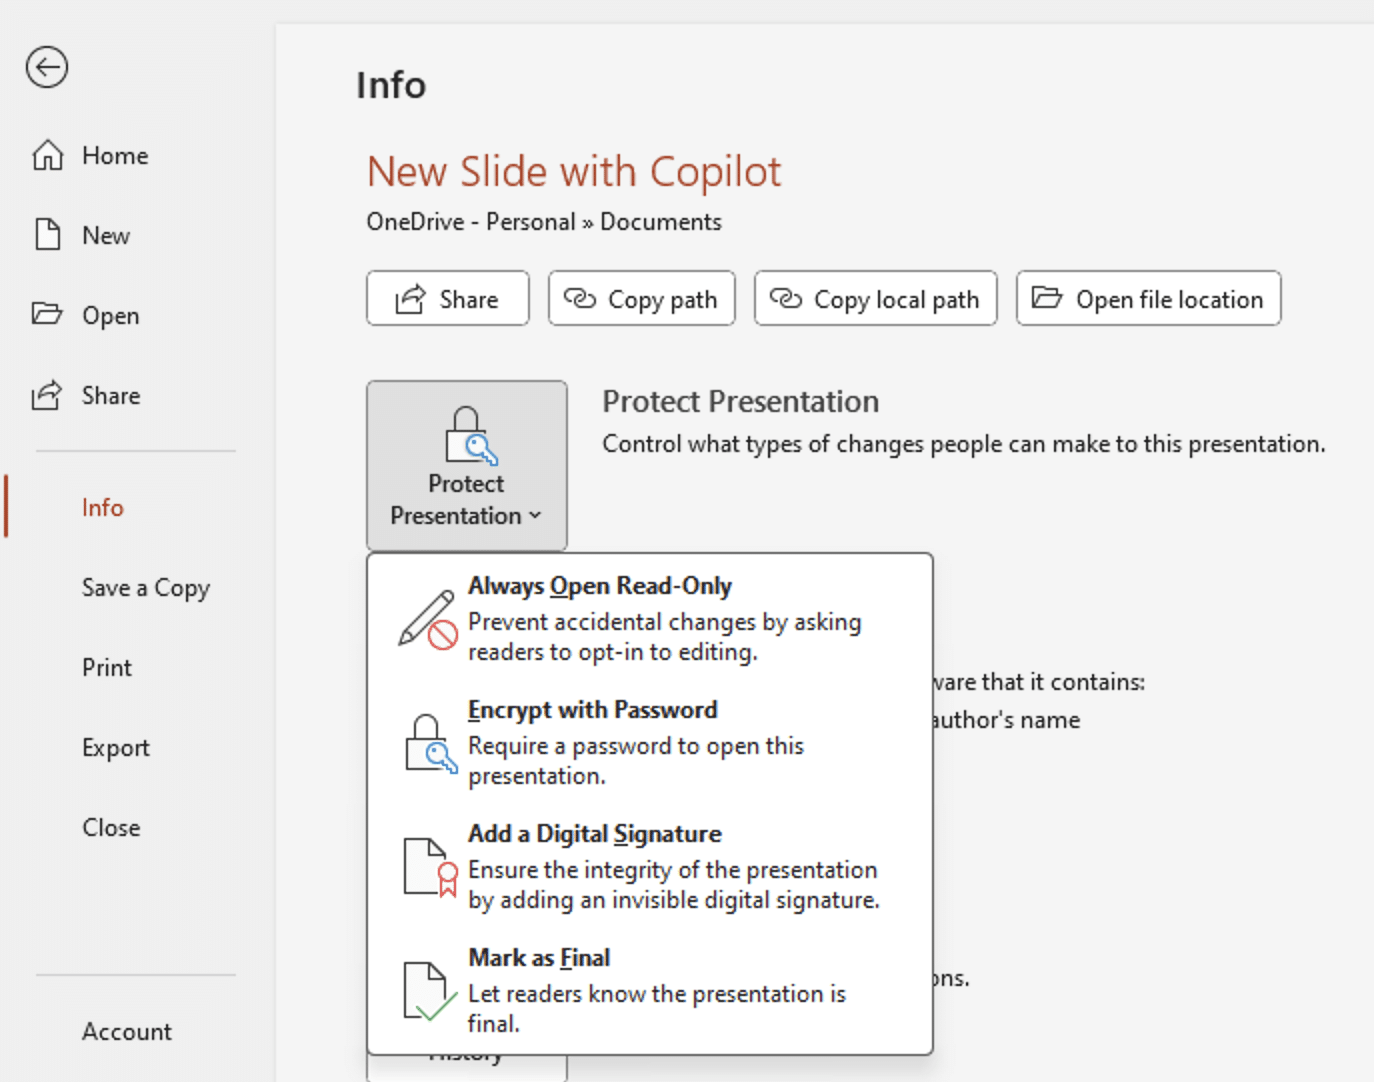
To protect your file, click the File button.
In PowerPoint for Windows look at Info | Protect Presentation.
You’ll then see options for securing your presentation:
- Always Open Read only,
- Encrypt with Password
- Add a digital signature
- Mark as Final
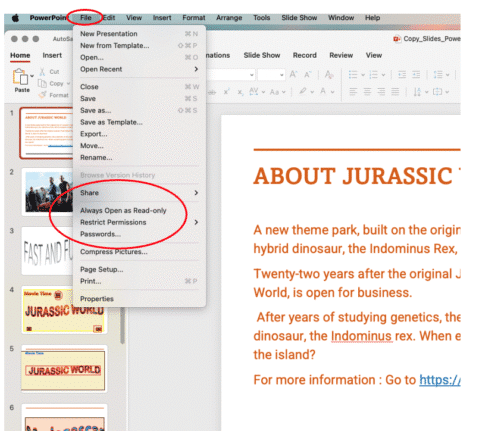
On PowerPoint for Mac, there are similar options under the File menu.
Making your file read-only
One way to protect your PowerPoint presentation is by sharing it as a read-only file. This allows others to view the slides and run the slideshow without requiring a password, while preventing them from editing or copying the content—helping maintain the integrity of your work.
Enabling the Always Open Read-Only setting adds a gentle layer of protection by displaying a message bar each time the file is opened, prompting users to proceed in read-only mode.
It’s not going to deter anyone who wants to steal your content, but it is a good way to make people pause and reconsider before making any changes..
Password Protect PowerPoint files
PowerPoint allows you to add two types of passwords for file protection: one that restricts access to viewing, while the other blocks editing or making changes. In most situations, the second option—preventing modifications—is the more commonly used.
PowerPoint for Windows
Go to File | Info | Protect Presentation | Encrypt with Password.

Enter the password and retype to confirm.
There’s only one password option to allow the presentation to be opened and edited.
PowerPoint for Mac
Click File | Passwords from the dropdown menu to open a dialog box with options to secure your presentation.
Unlike the Windows app, PowerPoint for Mac gives more password control.
To completely restrict access, enter a password in the “Password to open” field—only users with the password will be able to view the file. If you simply want to prevent edits, use the “Password to modify” field instead.
if you want others to view the file but prevent them from making changes. After entering your desired password(s), click Set Password, then save the file to apply the protection.
PowerPoint can’t recover your file if you forget the password, so make sure to remember it. Click OK, then re-enter the password in the confirmation prompt.

Know the Limits
Password-protecting your PowerPoint deck enhances its security, but it doesn’t make it completely hack-proof. Choose a strong, unique password that combines letters, numbers, and symbols, and avoid sending the password through unsecured methods like plain-text email.
Save and Share with Caution
Once you’ve set a password, save the file to activate the protection. When sharing it, make sure to communicate the password securely—ideally through a separate, trusted method such as a secure message or a phone call. Taking just a moment to add this layer of security can greatly minimize the chances of accidental exposure or unauthorized access.
Removing Password
Removing a password lock from a PowerPoint file is easy but not obvious because there’s no ‘Remove Password’ or ‘Decrypt’ option.
Instead return to the Encrypt Password option and delete the password. Then save the now unencrypted PPT file.
Restrict Permission
In organizations, Restrict Permission allows you to control what others can do with your presentation after you share it. Instead of using a simple password, this feature uses Information Rights Management (IRM) to set more specific permissions—like who can view, edit, print, or copy content.
When you apply Restrict Permission in PowerPoint, you control who can access your file and what they can do with it. You can allow only specific people to open the presentation, decide whether each person can read or edit it, set an expiration date after which the file becomes inaccessible, and prevent recipients from copying, printing, or forwarding the content. This feature is especially valuable in corporate or collaborative environments where you need to share sensitive information while maintaining strict control.
Note: You must sign in with a Microsoft 365 work or business account to use Restrict Permission, and your organization must support Information Rights Management (IRM). This feature may not appear or work in all versions of PowerPoint for Mac unless IRM is set up.