Like Word, PowerPoint and Excel also have options to add borders to pictures to add that extra oomph to your work. Users can choose between fairly simple borders or add some further complex, fancy styles to their images.
If all this seems very familiar, it’s because the same picture tools are available in the main Office apps, Word and Outlook as well as Excel, PowerPoint and Publisher.
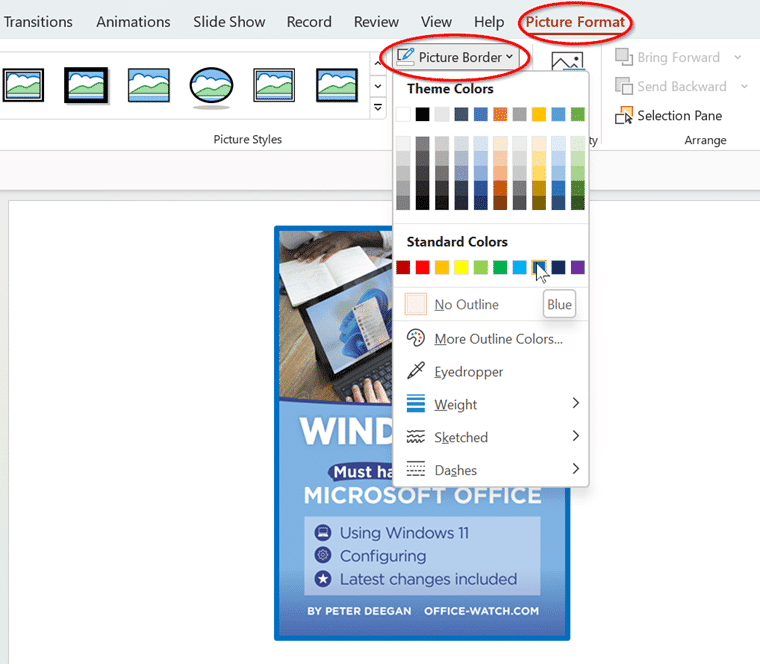
Simply insert your image into the PowerPoint slide or Excel worksheet, select it, then go to Picture Format | Picture Border.
From there, you can choose from a variety of colors, weight, and border styles.
Colors
There are four different ways to change the border color. Any color you hover over will immediately show up on your picture, select the color to keep the change.
Theme Colors
Located at the top, choose between various themed colors with differing accents and darkness percentages. Matches the theme styles you can find under Home | Drawing | Quick Styles.

Standard Colors
Below that you can choose between basic colors.

More Outline Colors
Select More Outline Colors to search for a precise color option. Specific a Hex code and even change up the transparency position. Receive a preview of the color before you click on OK to select it.

Eyedropper
Use the Eyedropper tool to select your color from the screen. This is super handy if you want to match the colors with your picture or some other part of the document or slide.

Once you’ve selected your color, simply click on it and it’ll apply it to the outline.

Weight
You can choose the width of the border by selecting the weight and choosing between ¼ pt to 6pt width.

If you’re wanting to go beyond that, simply click on More Lines… and you can enter a value under Width up to 1584 pt. You’ll be able to see the preview of your selection.

Line Style
Choose between sketched lines or dashes as the outline style for your picture.
Sketched lines give a more artistic look, such as the curved, freehand, and scribbled styles.

Or you can choose dashes instead, like round dot or long dash for a different touch.

Or why not both? You can select a dashed line and then apply a sketched look to the dashes. Both options allow you to delve further under ‘More Lines…’ to customise the lines even more so, including the nifty compound type option.

Gradient Line
Take it one step further by adding gradient colors to the border. Under Format Picture | Line | Gradient Line.
Choose the type of gradient, such as Linear, Radial, Rectangular and Path.
Additionally, you can customise the direction of the gradient, color, positioning and transparency.

So why not have a go at trying out the different customisation options, you can create many different styles, from simple to fancy.
Office Online apps
The browser based Office apps like PowerPoint Online have fewer border options than PowerPoint for Windows. Although it works for those that just want to add simple border lines to their images.

Change Picture from clipboard in Word and Office
Adding Footnotes to Pictures in Word
Set Picture as Background in OneNote
How to copy a picture from an Outlook email